AI-generated video can be stunning, but making it feel real — with cinematic depth, emotional weight, and a sense of authenticity — takes more than a “hyperrealistic” prompt. In fact, over-sharpened, over-textured footage is one of the easiest giveaways that a shot is AI-generated.
As a director, photographer, painter, illustrator, 3D artist, and cinematographer, I’ve spent years learning how to bridge traditional filmmaking storytelling methods with modern AI tools. Today I’ll share my custom workflow for VEO 3 Flow, mixing it with Midjourney and enhancing it with my own AI Render Pro methodology.
The goal? A pipeline that delivers visual narrative techniques that could pass for real-world cinematography.
1. Start With a Human Core
All good storytelling starts with the character. In AI workflows, it’s tempting to focus entirely on prompt detail without thinking about the human core — who is this person, and why do they matter in the scene?
When I create a subject for VEO 3 Flow, I treat it like casting an actor. I think about:
- Age, gender, and ethnicity — each combination changes how we perceive the character.
- Body type and posture — subtle differences in build and stance can suggest confidence, vulnerability, or tension.
- Imperfections — scars, skin texture, asymmetrical features, moles, wrinkles.
These imperfections are not defects — they’re narrative elements. In photography and painting, the most memorable portraits are rarely flawless; they’re compelling because they contain history, hints of a lived life. AI, left unchecked, will smooth away these details. I work against that by explicitly instructing VEO and Midjourney to keep them.
2. Build an Environment With Story
In real productions, a good location scout doesn’t just find a place that looks pretty — they find a space that tells part of the story.
AI-generated environments should be treated the same way.
I decide on:
- Type of location — Is it a back alley in neon-lit Tokyo, a dusty ranch in the American Southwest, or a suburban kitchen with sunlight spilling over old countertops?
- Signs of wear and life — Graffiti on the walls, oil stains on the ground, weathered wood, fog rolling in from the distance.
- Atmospheric presence — Is there wind? Are there distant sounds implied by motion in the frame?
Because I also work in 3D art, I know that an empty, textureless background flattens a scene. So I layer in visual cues that give scale and depth — multiple planes of focus, foreground elements partially obscuring the subject, and environmental effects like haze or dust motes catching the light.
3. Light Like a Cinematographer
Lighting is the single most powerful tool for shaping mood and realism.
AI tools often default to generic, “balanced” lighting — even when the scene would benefit from dramatic contrast or directional emphasis.
I always decide:
- Light source type — Is it natural sunlight, a flickering neon tube, a desk lamp, or artificial lighting designed to look natural?
- Light quality — Soft wraparound light for gentle moods, hard-edged shadows for tension.
- Exposure ratio — I often use 2:1 or 4:1 for a balance of shadow detail and contrast.
Every light must have a story reason. For example, in a crime drama alleyway, a single overhead bulb might create a pool of light that frames the subject, while the rest of the space falls into darkness — drawing the viewer’s attention and adding narrative weight. AI can produce this if you instruct it to think like a DP, not just an image generator.
4. Camera Language & Lens Choice
A shot is not just what you see — it’s how you see it.
Low angles make subjects imposing; high angles make them appear diminished.
Wide lenses create spatial intimacy but also distortion; telephoto lenses compress space and flatten depth.
When I frame AI shots, I use:
- Rule of thirds to balance composition.
- Leading lines to guide the viewer’s eye.
- Symmetry or asymmetry depending on the tone — Wes Anderson symmetry for whimsical control, Dutch angles for unease.
Lens choice is just as important. For realism, I might mimic the subtle barrel distortion of a vintage 35mm lens or the creamy compression of an 85mm portrait lens. Aperture settings — f/1.4 for shallow, cinematic bokeh, or f/8 for clarity — give the shot the same optical behavior a real camera would have.
5. Micro-Details: Eyes, Skin, Hair
The uncanny valley often starts in the eyes.
Our brains are wired to detect emotion and intent from tiny eye movements, reflections, and color variations. If the sclera is too white, if the iris texture is flat, or if the reflections don’t match the light source, the viewer will feel something is wrong before they consciously notice it.
I add:
- Slight redness or yellow in the sclera for realism.
- Skin with visible pores, slight oil or sweat where appropriate.
- Hair with stray strands and variable thickness — because perfect hair doesn’t exist outside of shampoo ads.
These details may seem minor, but in filmmaking storytelling methods, they’re what let a close-up carry emotional weight.
6. Atmosphere: The Invisible Layer
Light needs something to interact with. That’s why cinematographers use haze machines on set — to make beams visible, to give the air a physical presence.
In AI, I simulate this with:
- Dust motes
- Fog or mist
- Heat distortion
- Rain or snow with depth cues
Even in outdoor scenes, a slight atmospheric texture adds scale and realism, grounding the subject in space.
7. Color as Narrative
From my painting background, I apply the 60-30-10 rule:
- 60% dominant color to set the emotional baseline.
- 30% secondary color to create visual contrast.
- 10% accent color for focus and visual “pop.”
Warm, low-saturation palettes feel nostalgic; cool, high-contrast palettes feel tense. In AI prompts, I’ll specify color temperature, saturation levels, and even post-processing references (“Kodak Portra 400 color palette”).
8. The Midjourney → VEO 3 Flow Pipeline
Here’s where integrating Google Flow with other tools shines.
Process:
- Build a still in Midjourney with all realism cues baked in — lighting, imperfections, atmospheric layers, optical effects.
- Export the chosen frame.
- In VEO 3 Flow, use Frames-to-Video to animate it, keeping prompts consistent to preserve tone and detail.
Midjourney gives me near-perfect control over still image detail, while VEO 3 Flow gives me movement, continuity, and the ability to apply visual narrative techniques over time.
9. Iteration Is Non-Negotiable
Like any film production, the first pass is rarely the best. I use VEO’s Fast mode (20 credits) for experimentation, reserving Quality mode (100 credits) for final shots.
If something feels slightly “off” — skin too smooth, lighting too flat — I run a JSON breakdown on the image, feed it back into the pipeline, and adjust only the parts that need refinement. This way, I don’t lose the good elements in pursuit of improvement.
10. Consistency Across Shots
For recurring characters, I create them in Higsfield with 20–50 clean reference shots. This locks in their design so they stay recognizable across multiple scenes.
For dialogue, I use ElevenLabs to clone my own voice, syncing it with the visuals in DaVinci Resolve. In final grading, I add film grain, slight chromatic aberration, and micro-imperfections that break the AI’s default “clean” aesthetic.
Midjourney Prompt Pack for VEO 3 Flow
Here are AI Render Pro–refined prompts for creating Midjourney keyframes ready for VEO animation.
Prompt 1 — Sci-Fi Drama
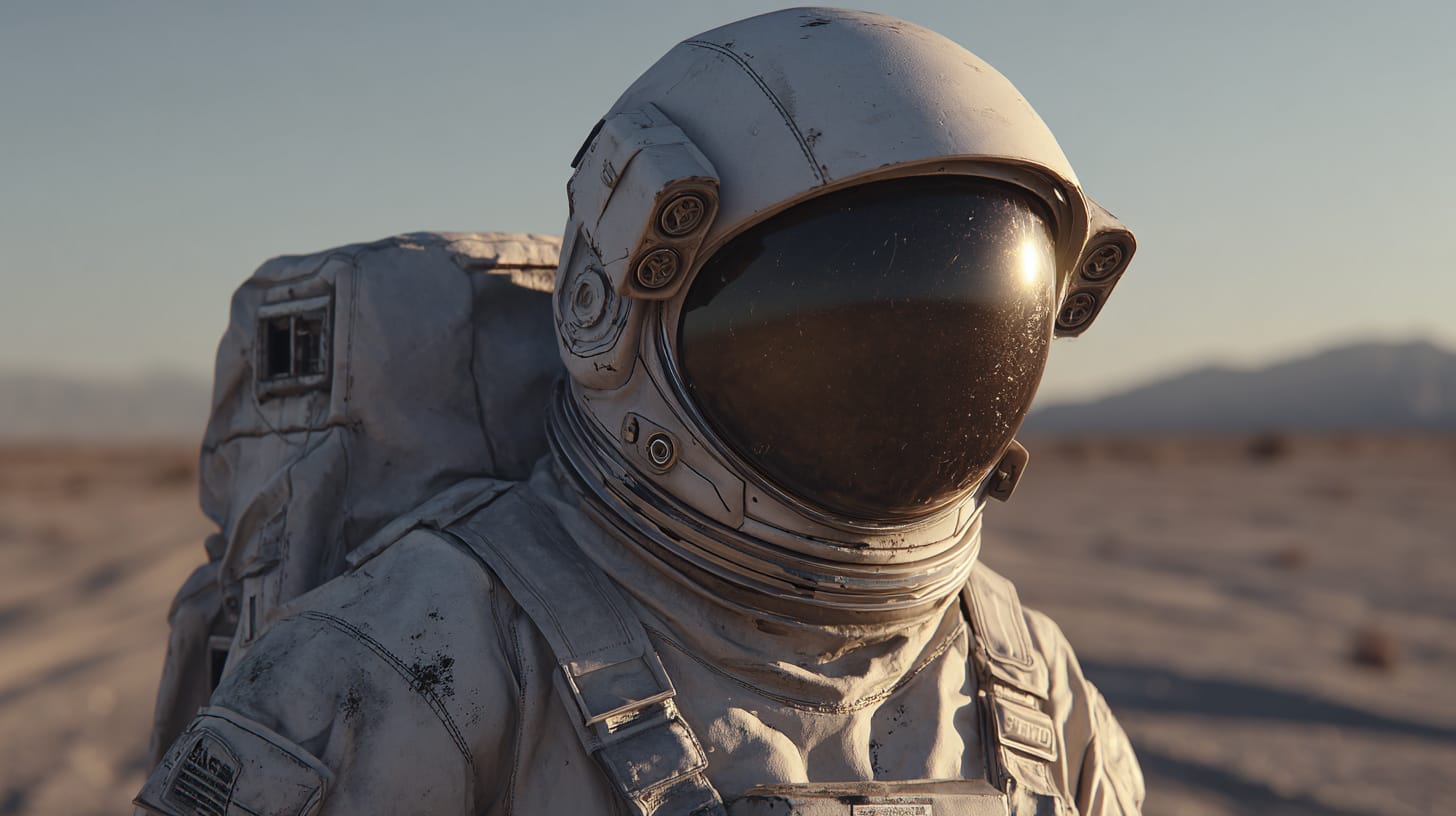
A photorealistic lone astronaut standing in a windswept alien desert, golden hour light wrapping around the helmet, dusty atmosphere with floating particles, subtle scratches on the visor, captured on a vintage anamorphic lens, 2:1 exposure ratio, shallow depth of field, realistic lens flares, soft analog bloom, natural film grain, no AI look, no stylization --ar 16:9 --v 7(generated by AI Render Pro)
Prompt 2 — Period Drama
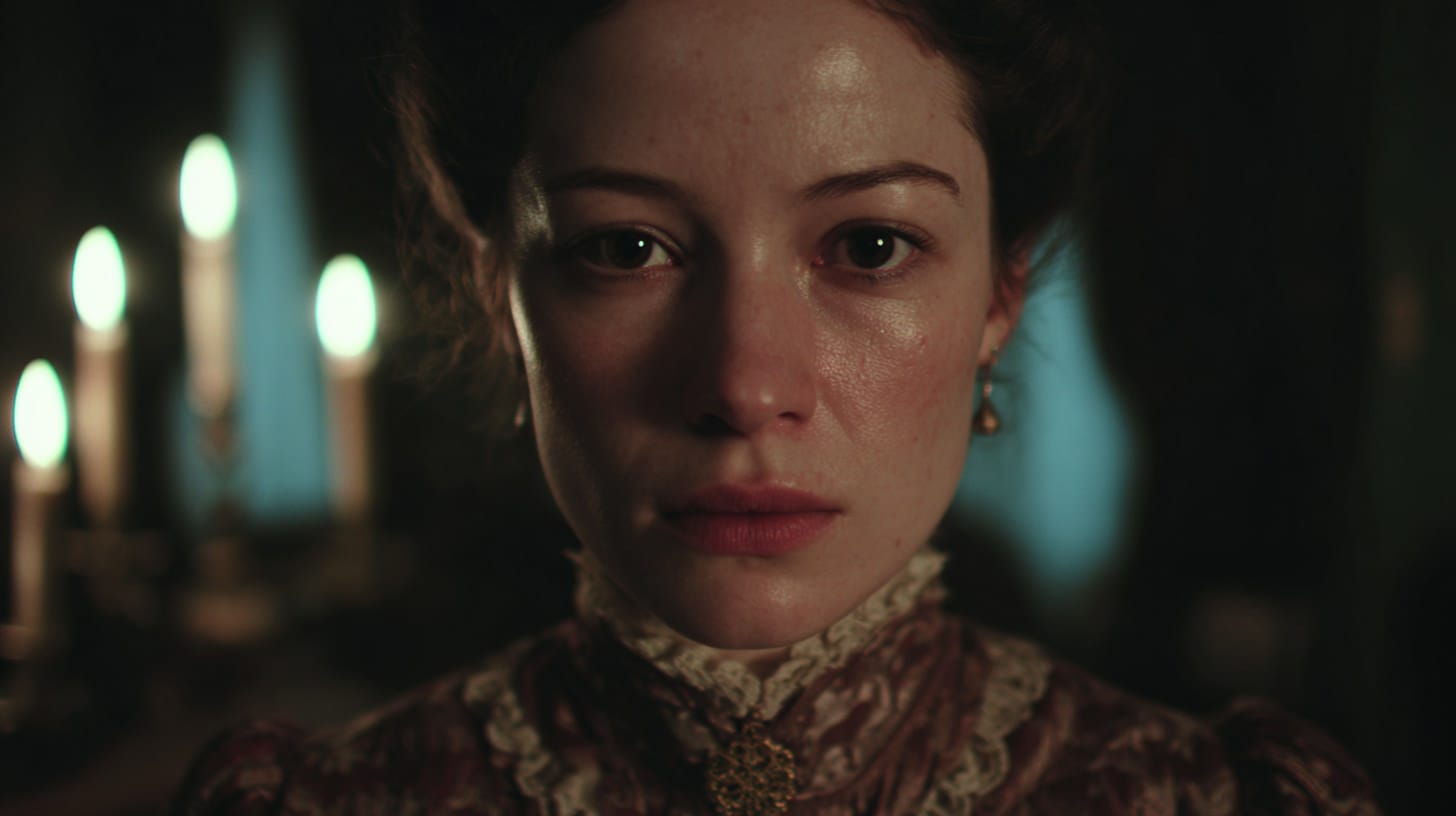
A photorealistic 19th-century woman in a dimly lit parlor, soft candlelight creating gentle shadows, imperfections in skin texture, authentic Victorian dress with slight wear, painterly depth of field, Wes Anderson symmetry, captured on vintage portrait lenses, 4:1 lighting ratio, subtle lens breathing, natural film grain, no AI look, no stylization --ar 16:9 --v 7(generated by AI Render Pro)
Prompt 3 — Urban Night Scene

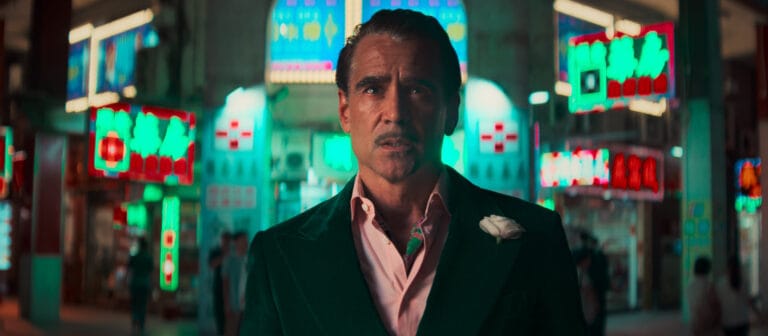
A photorealistic rain-slick neon street in Tokyo, main character under an umbrella, reflections in puddles, subtle wrinkles in clothing, cinematic bokeh, captured on a 35mm prime lens, mix of practical neon and soft fill lighting, shallow depth of field, realistic lens flares, analog bloom, visible film grain, no AI look, no stylization --ar 16:9 --v 7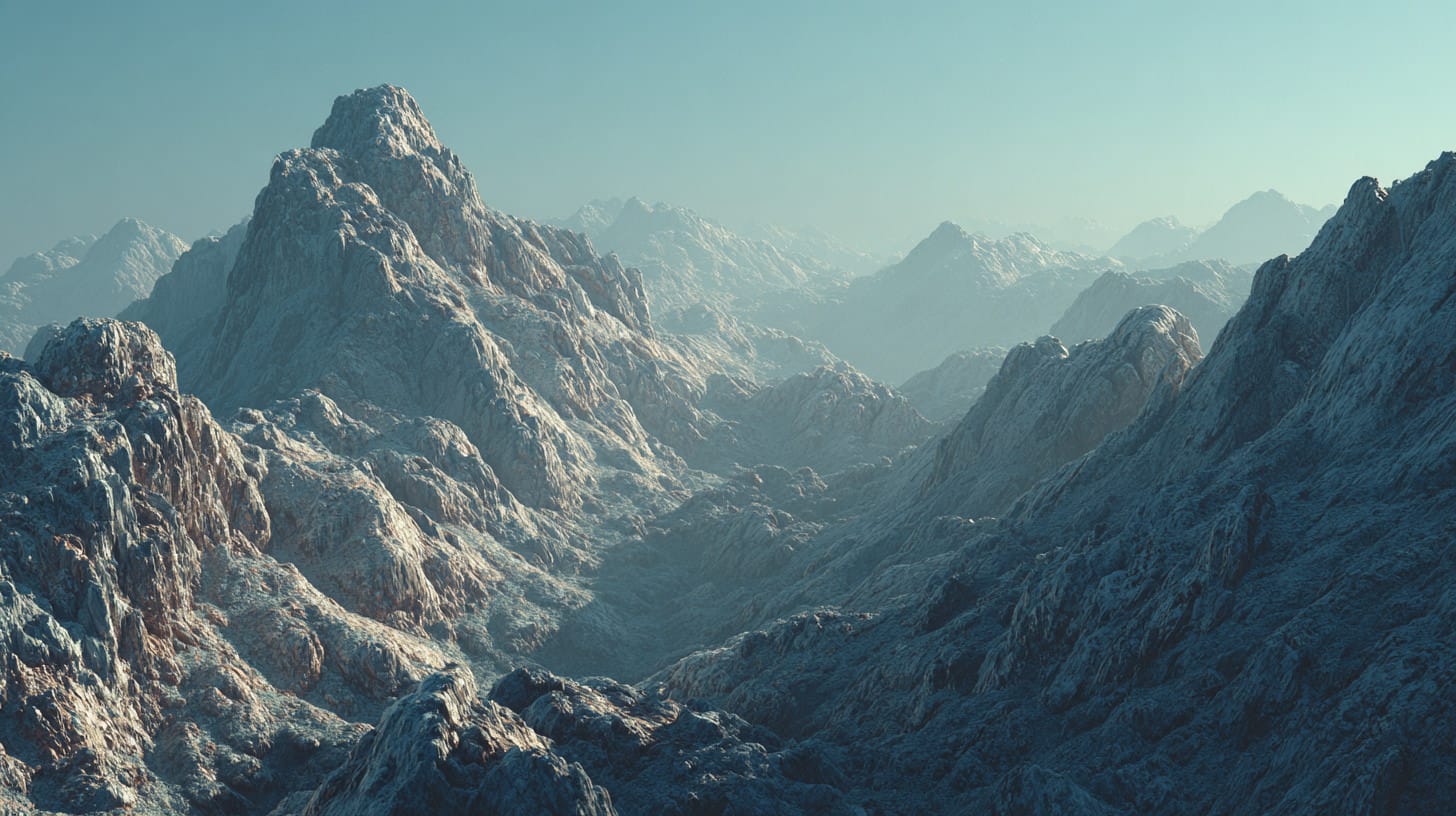
Prompt 4 — Natural Landscape
A photorealistic rugged mountain pass at dawn, mist rolling through valleys, light catching frost on rocks, imperfections in terrain, cinematic scale, captured on a wide-angle vintage lens, soft pastel color palette, 2:1 exposure ratio, atmospheric depth haze, organic lens flares, subtle film grain, no AI look, no stylization --ar 16:9 --v 7(generated by AI Render Pro)
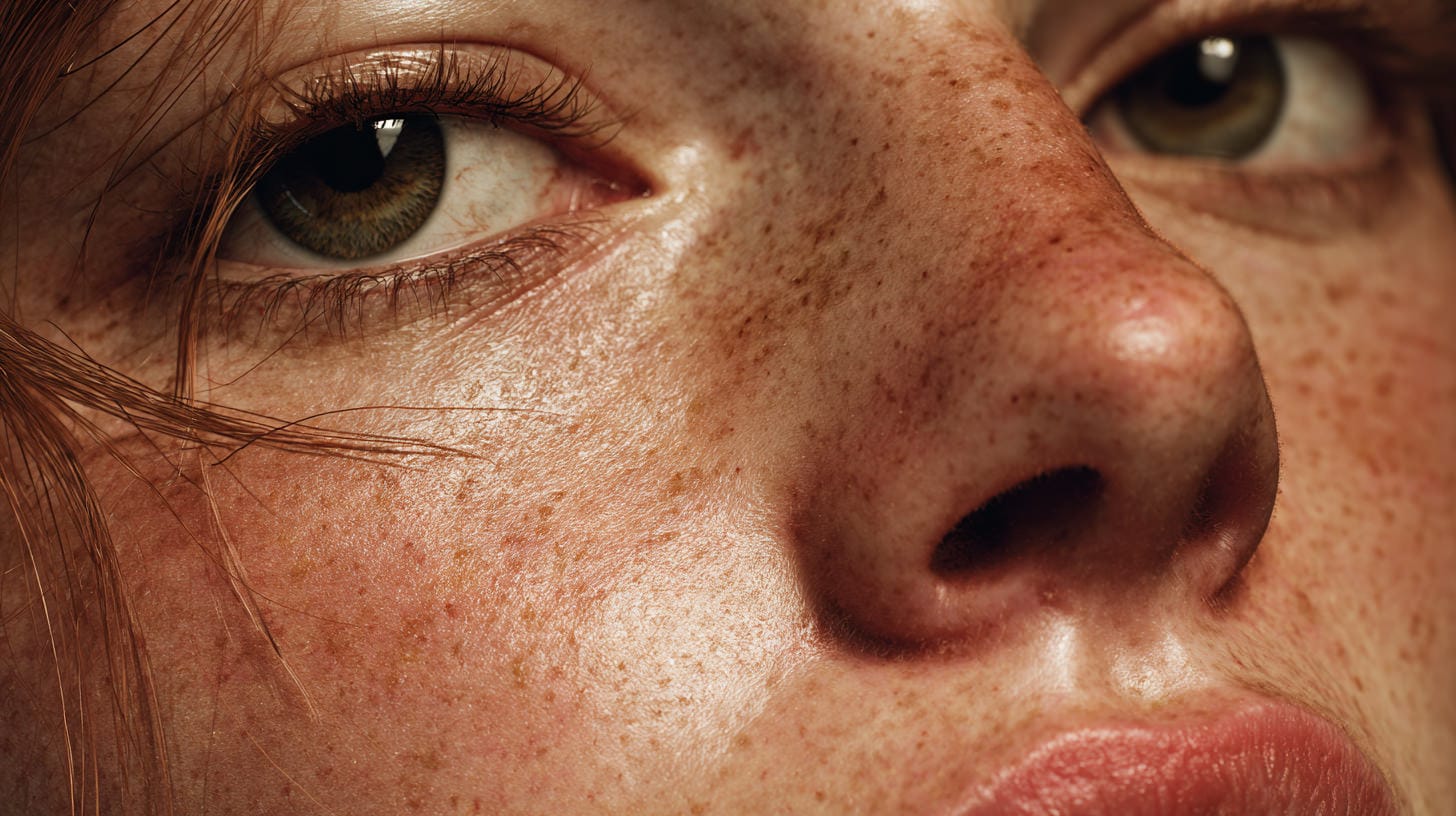
Prompt 5 — Commercial Beauty
A photorealistic close-up of a model’s face, natural imperfections in skin, soft beauty lighting, minimal makeup, slight flyaway hairs, shallow depth of field, captured on an 85mm prime lens, neutral color grading with warm highlights, realistic skin texture, gentle lens falloff, visible film grain, no AI look, no stylization --ar 16:9 --v 7(generated by AI Render Pro)
Pro Tip: Always carry over your Midjourney realism details into VEO prompts to maintain consistency.
Q&A
Q: What makes VEO 3 different from other AI video tools?
A: VEO 3 Flow’s control over visual narrative techniques gives it an edge for cinematic realism.
Q: Can I combine VEO 3 Flow with Midjourney?
A: Absolutely — my pipeline uses Midjourney for detail control and VEO 3 Flow for animation.
Q: How does this improve filmmaking storytelling methods?
A: By integrating AI with cinematography principles — light, lens, blocking — you strengthen immersion.
Q: Is this workflow only for big productions?
A: No. These filmmaking storytelling methods scale for indie creators and commercial work alike.
AI Render Pro — Built for Cinematic AI
Everything here is embedded in my AI Render Pro philosophy. Imperfections, lighting ratios, lens realism, atmospheric texture — they’re not afterthoughts; they’re in the model.
That means you start with footage that already looks like it belongs in a cinema.
Learn more about AI Render Pro →
Try AI Render Pro Today!
One-time payment – Only $49.9, Now $15!
BUY NOW
Discover more from Olivier Hero Dressen Blog: Filmmaking & Creative Tech
Subscribe to get the latest posts sent to your email.