
Key Takeaways
- First insight: Great drone cinematography is 80% pre-production planning and 20% flying skill. The best shots are designed on paper before the battery is inserted.
- Craft highlight: Using manual camera settings (shutter angle, ISO, white balance) rather than auto modes separates professional aerial cinematography from hobbyist footage.
- Industry context: The FAA and EASA regulatory frameworks for commercial drone operations have matured significantly through 2026, making Part 107 and equivalent licenses essential for any paid aerial shoot.
- Bottom line: Master the nine secrets of blocking, camera movement, lighting, sound design, and post-production flow to transform drone footage from tourist snap to cinematic storytelling.
Drone cinematography has become a non-negotiable tool in the modern filmmaker’s kit, but most aerial footage still looks like a real estate fly-through rather than a narrative sequence. Across twenty years of commercials, music videos and shorts, the same nine principles keep separating professional drone work from footage that merely happens to be shot from the air. These are the ones that turn a flying camera into a storytelling instrument.
Need a Director for Your Next Project?
From commercials to branded campaigns—Olivier brings creative vision and technical expertise.
→ View Projects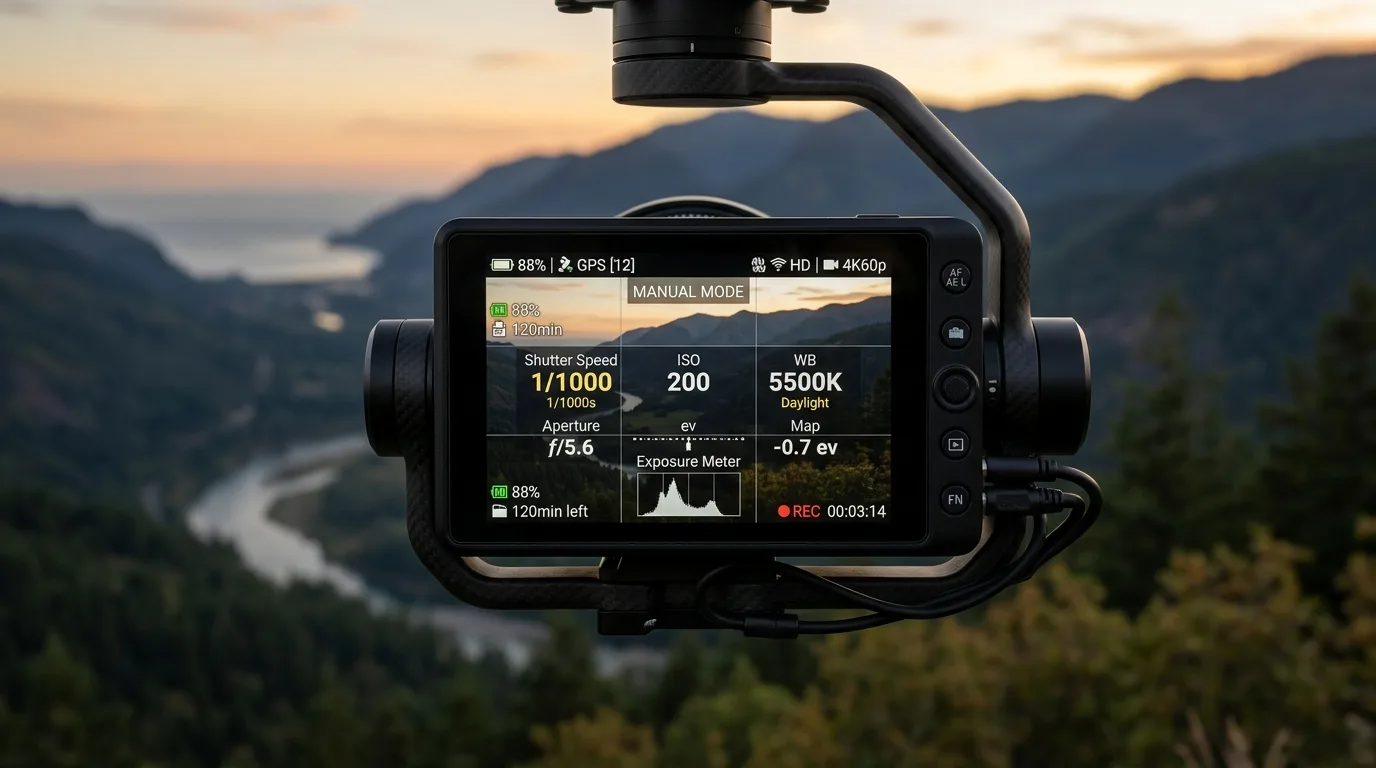
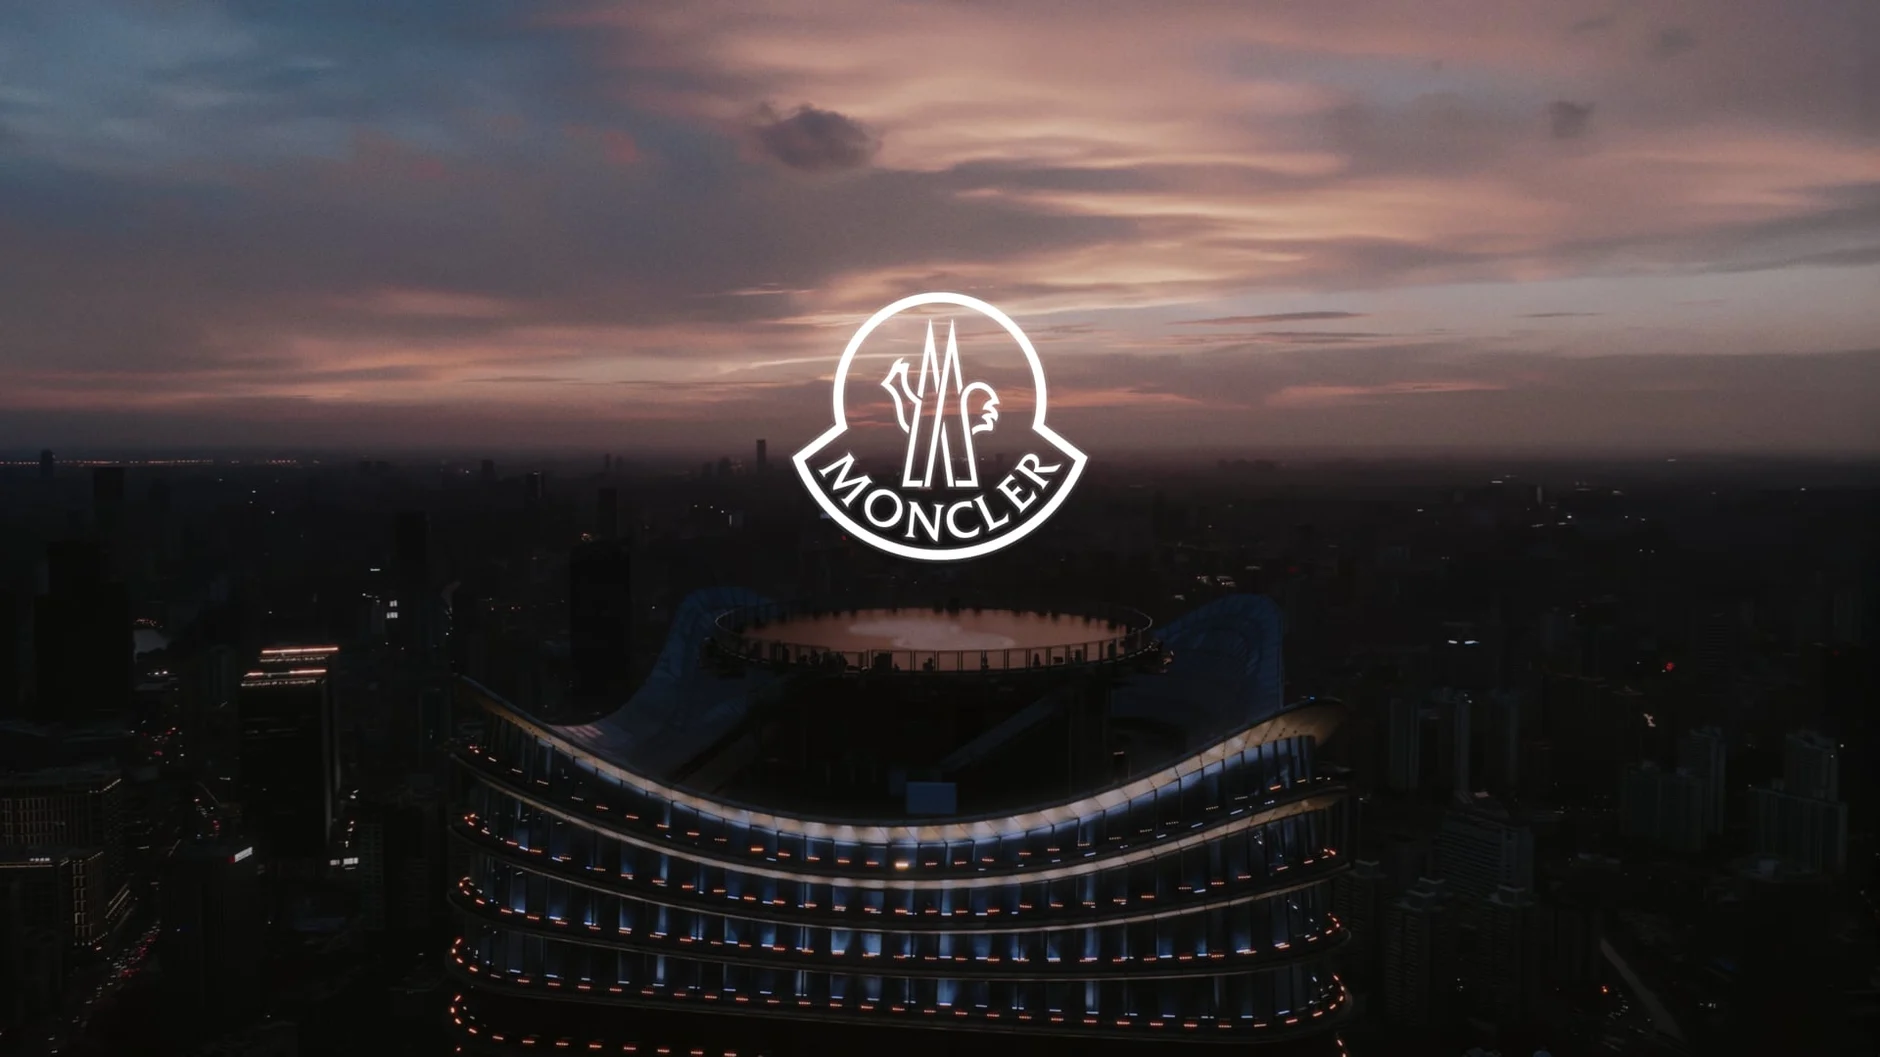
The Shanghai Job: Lighting a Helipad From the Air
Moncler’s 70th anniversary film was shot on a helipad near the top of a tower in Pudong, in the middle of Shanghai, on an anniversary deadline that could not move. Almost every problem worth writing about here came from that job, and most of them had nothing to do with flying.
The airspace is the first shot you have to win
Central Pudong is some of the most protected airspace in the world. Nothing about the schedule mattered until that was cleared, which meant permissions were not a form to file but a workstream running in parallel with everything else. We worked with one of the best drone teams in China, and a large part of what you hire at that level is not piloting. It is the ability to get you legally into the air over a city centre on a fixed date.
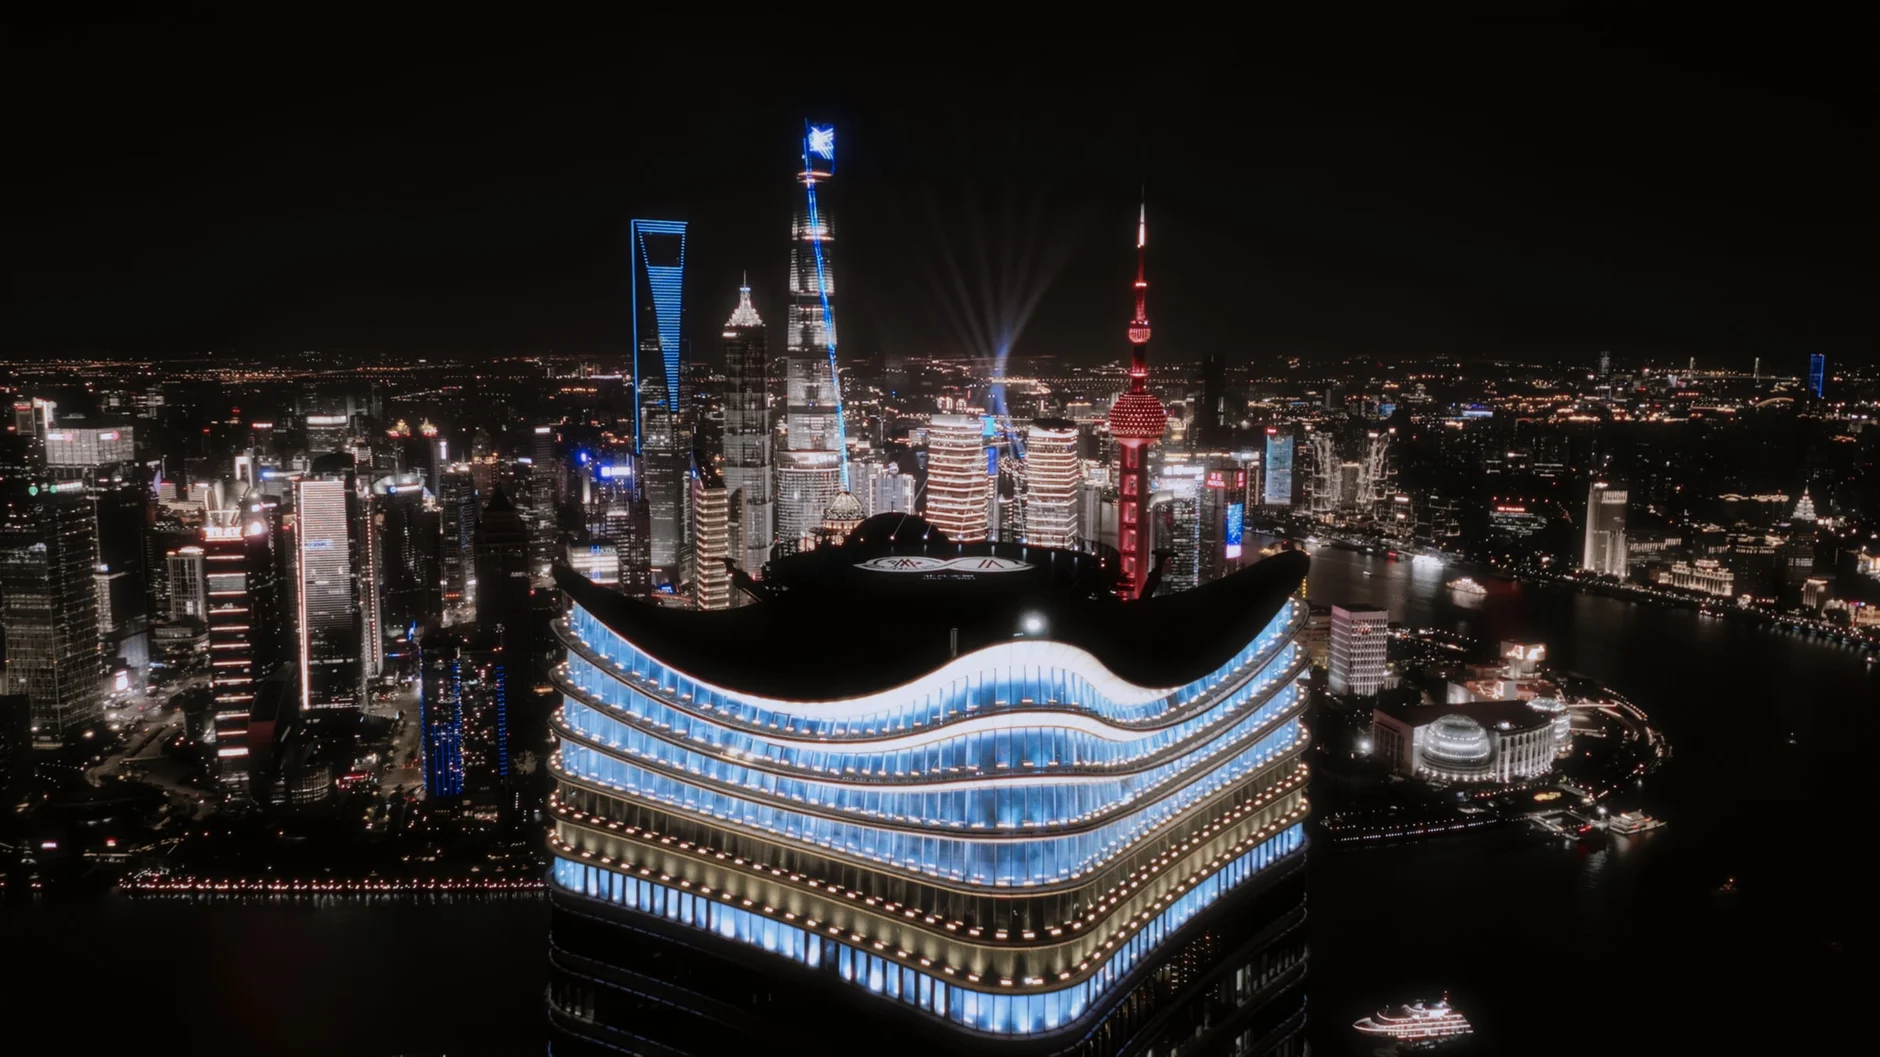
If you take one thing from this article into a bid, make it that: on any serious aerial job, treat clearance as a line item with an owner, not as something the pilot sorts out.
Every airframe, chosen per problem
We used effectively every type of drone available at the time. Conventional camera drones for the controlled work, heavy-lift for anything carrying weight, and FPV for the moves that needed to feel like they had momentum. The FPV passes exist for one reason: I wanted the camera to feel like it was genuinely flying as it came around the building, with speed you can feel rather than a smooth glide.
That is the choice being made in the section above on camera movement. Not which drone is best, but which airframe answers this specific shot.
The problem I did not see coming, and the fix I did not know existed
I direct, but I shoot as well, and on set that pays for itself in the moments nobody planned for. Standing on the helipad I noticed the light was raking across the surface at a shallow angle, and because the Moncler logo is printed onto the deck, every ridge and imperfection in that print was throwing its own shadow. On camera the logo read as damaged rather than as a graphic.
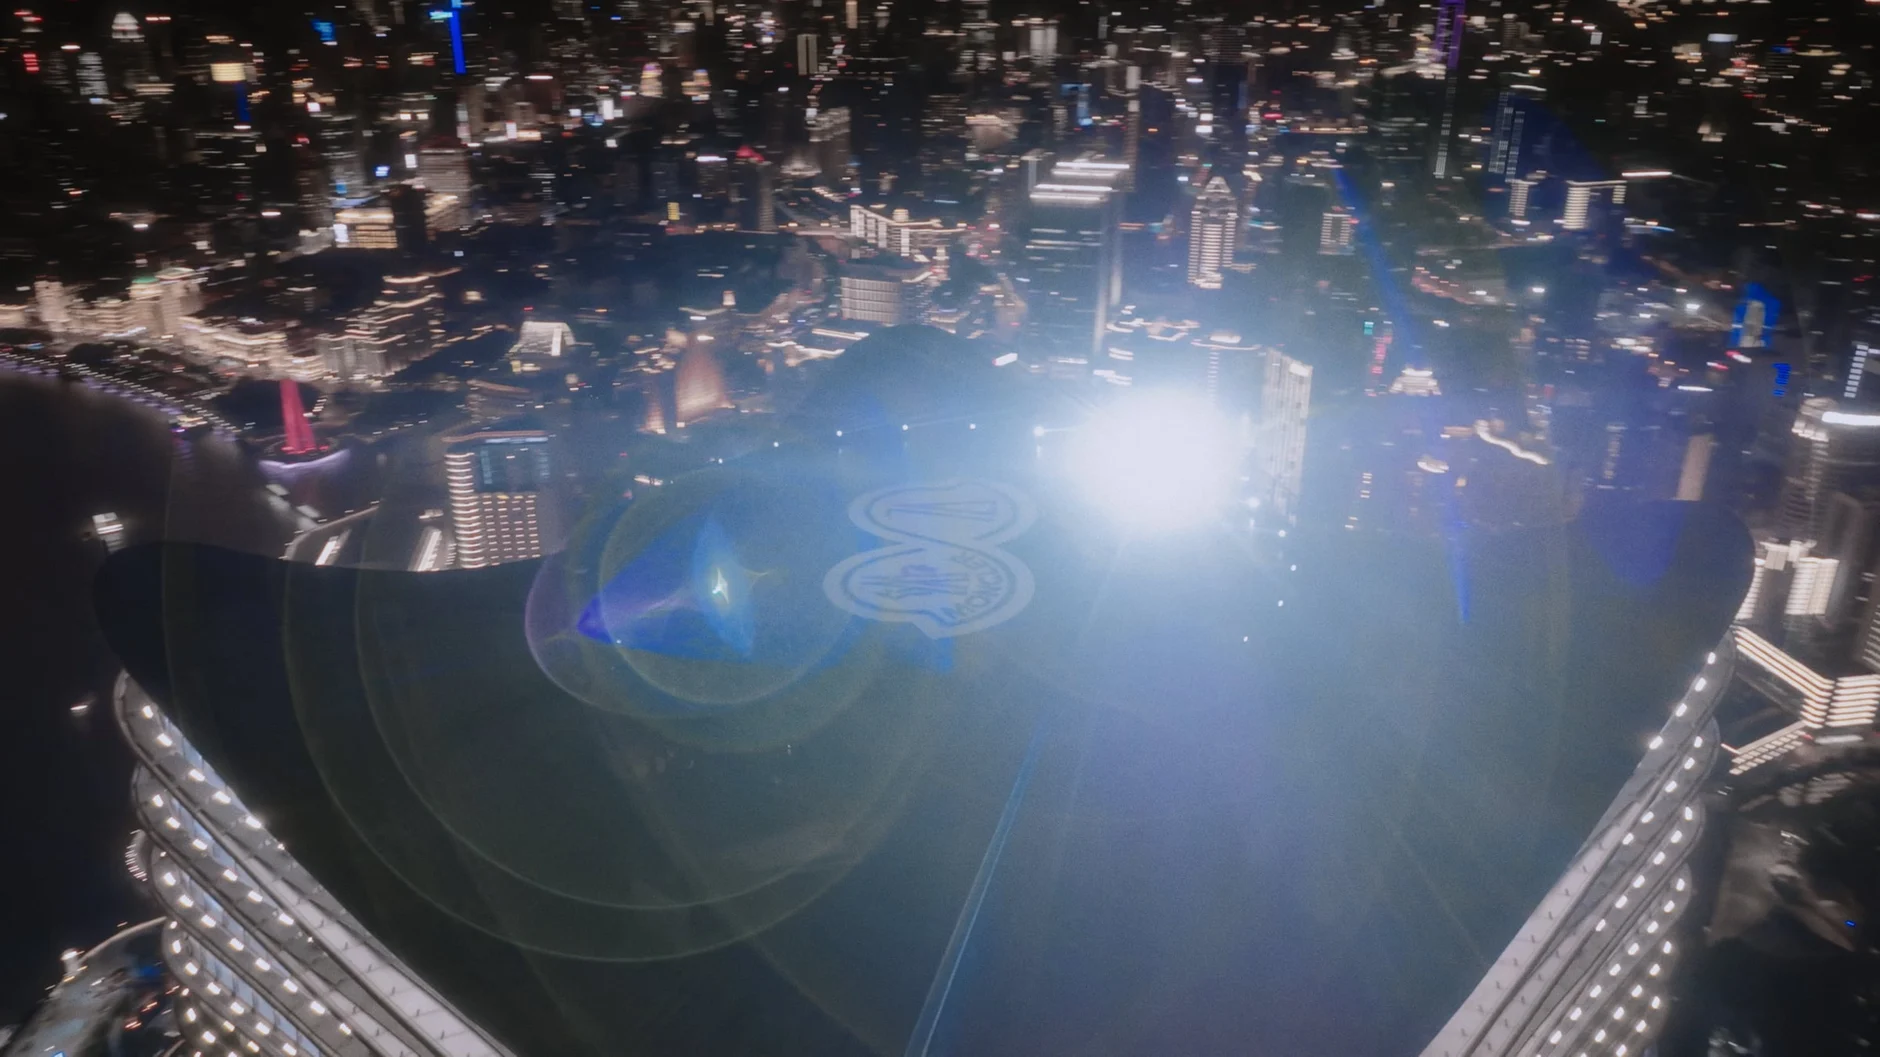
The fix was to put a second light on a drone, fly it up, and light straight down onto the deck to cancel the raking shadows. I suggested it without knowing whether it was even possible. It turned out the team had the equipment with them and it was completely seamless.
That is the wider point about drones that I keep coming back to. A drone is not only a way to put a camera somewhere impossible. It is a way to put anything somewhere impossible, and once you think of it as a rigging position rather than a camera position, a whole class of problems opens up. There is no other way to put a top light over a helipad several hundred metres in the air.
The light show was choreography, not coverage
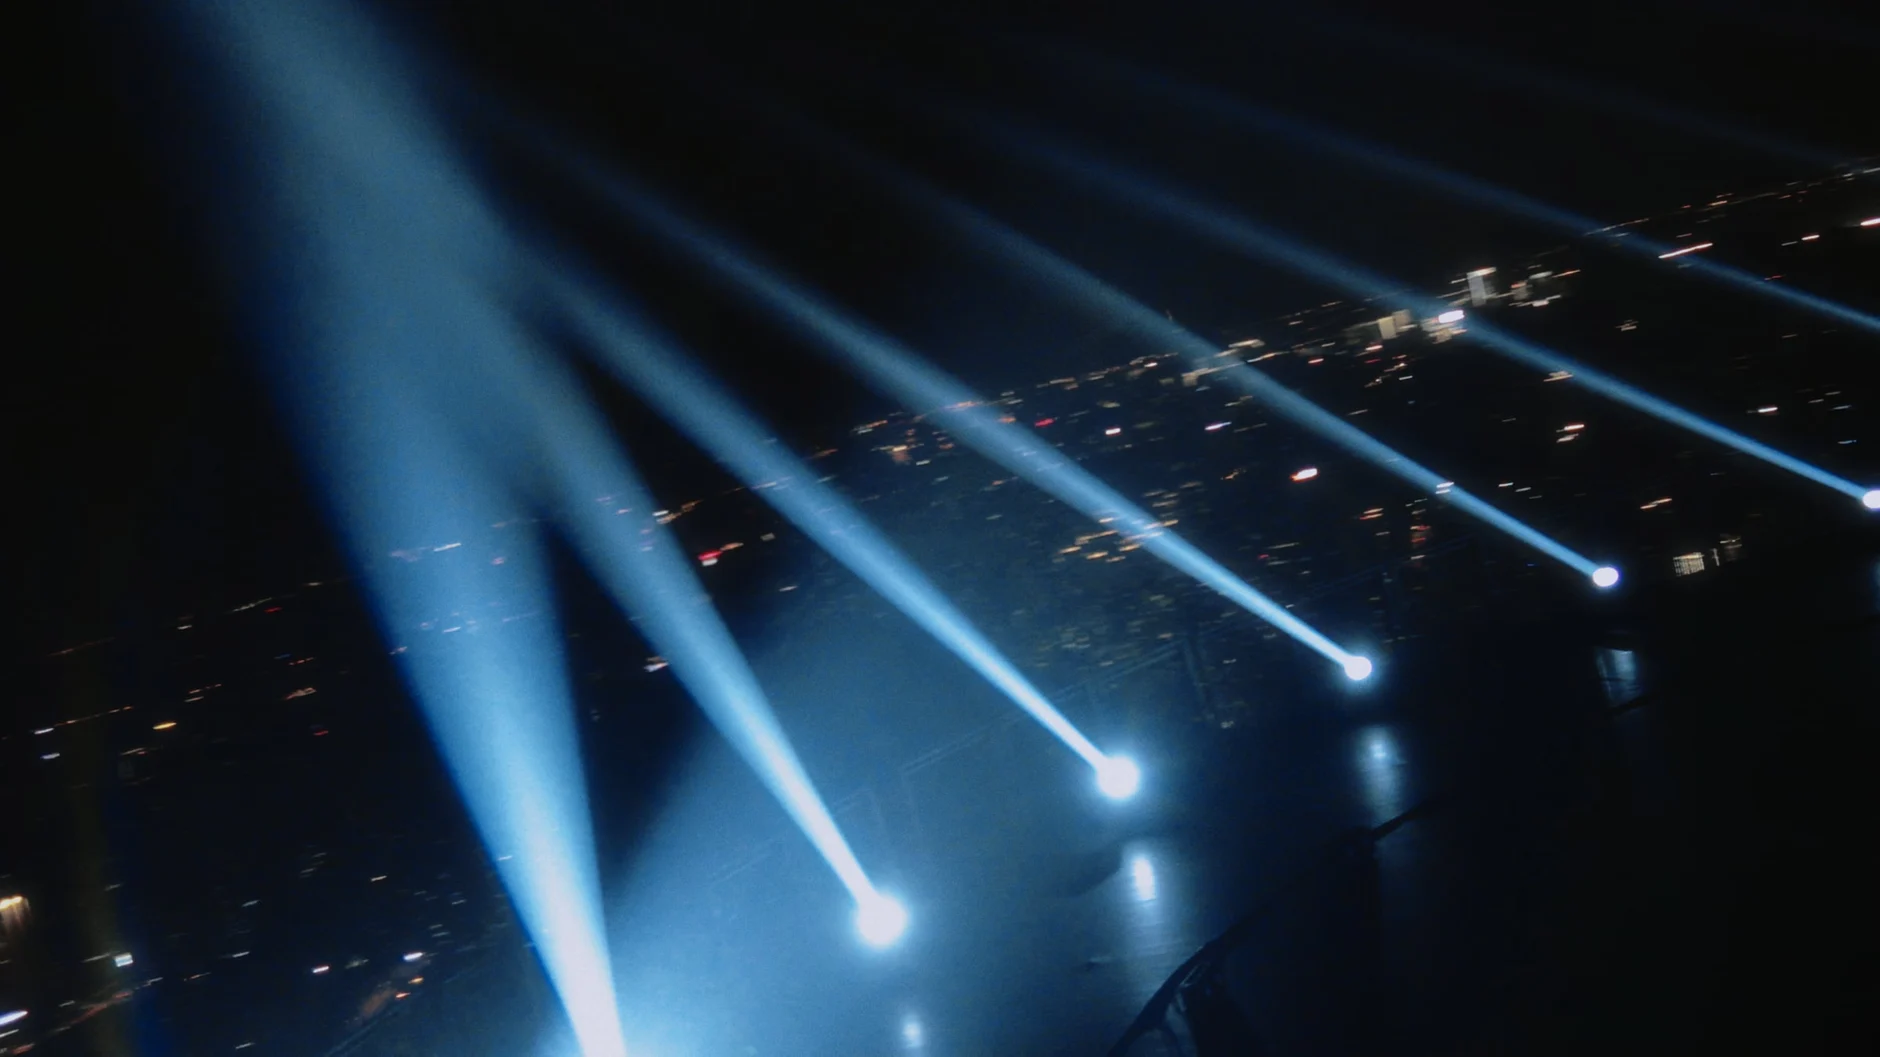
The entire light sequence over the tower was staged for us and planned far in advance. Storyboarding and previs were not a formality on this one: we timed the drone’s climb, the descent, and each stage of the lighting choreography over and over against the sequence, because the show ran to its own clock and the flight had to meet it.
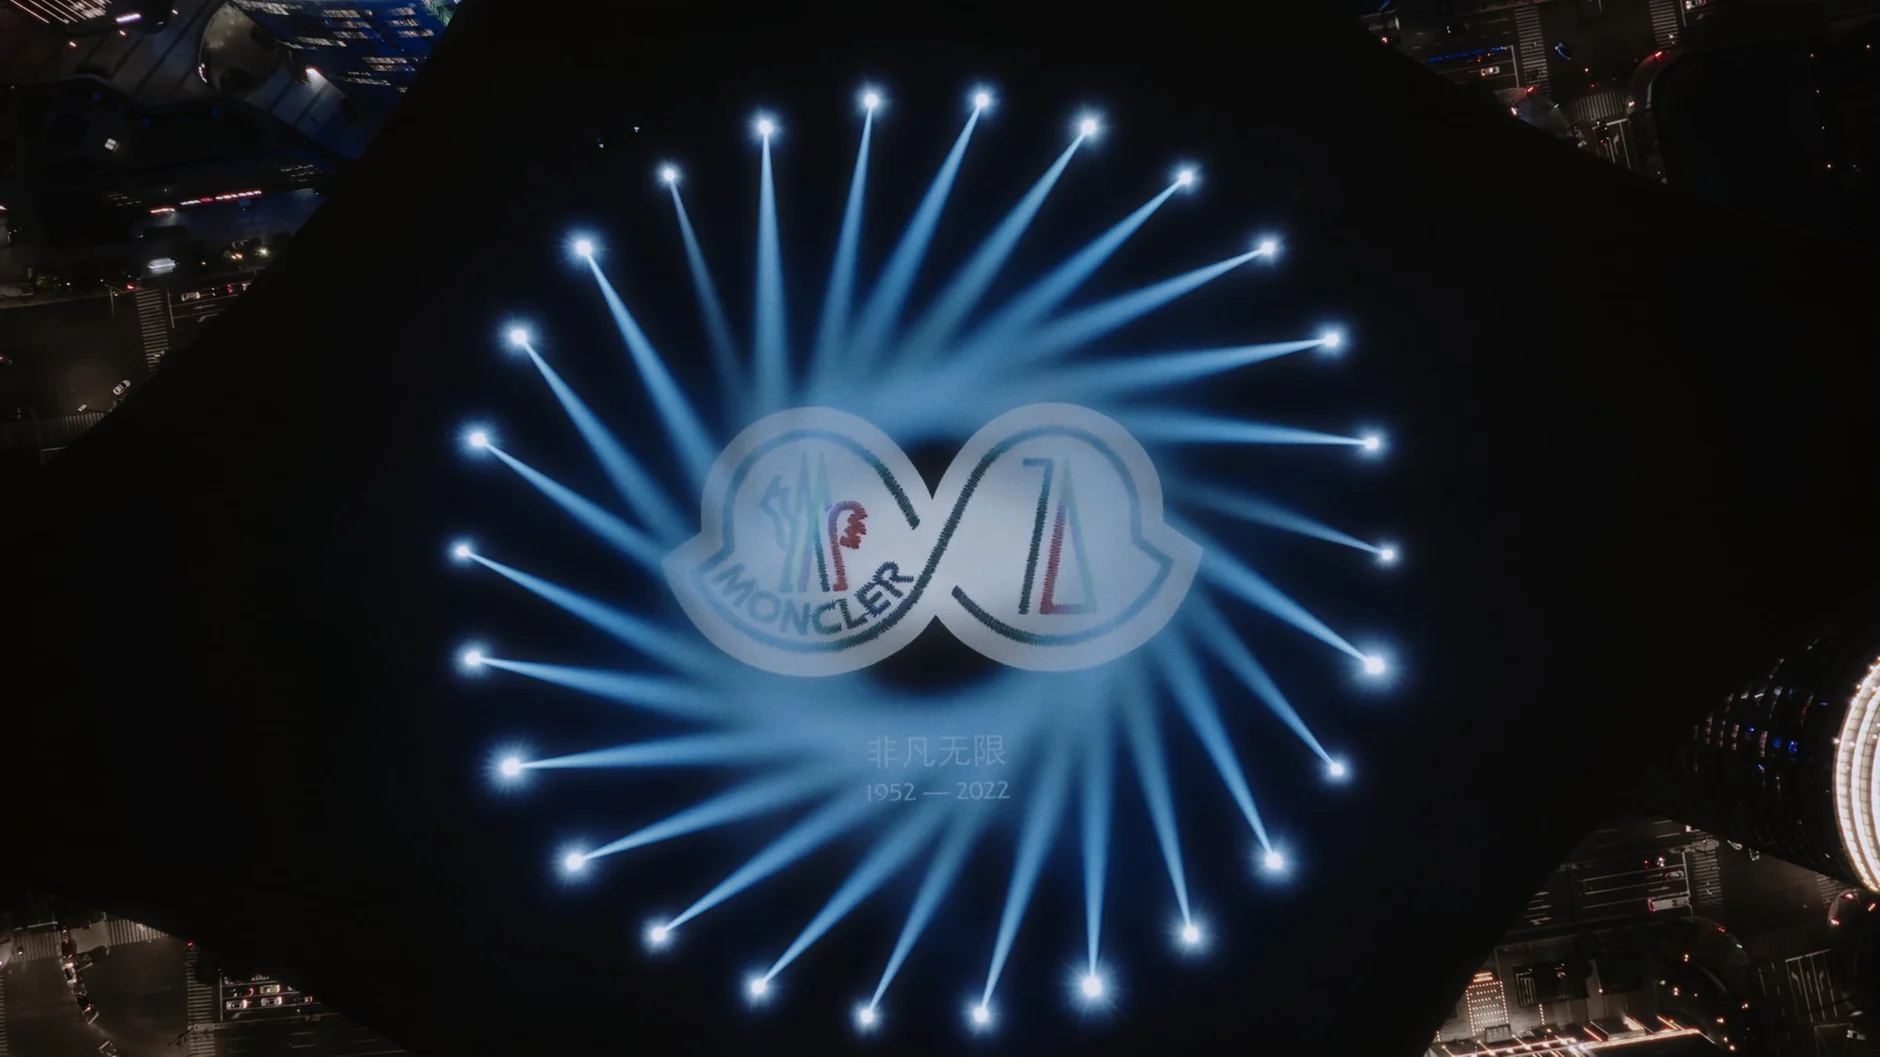
This is what the pre-production section earlier means in practice. When a battery cycle caps your take and the event only happens once, the shot is either resolved on paper or it is not resolved at all.
What got cut, and what that teaches
The original concept was more ambitious. A graphic line of light was to fly around the building alongside the camera and resolve into the Moncler monogram, hovering over the tower and the helipad. It was cancelled outright. I still think it was the most interesting idea in the treatment, and losing it changed the edit considerably.
Without that device, the film risked reading as a piece about the building rather than about the brand. That was the real editorial problem: it had to land as a reveal for a 70th anniversary, not as a real estate video with a logo on it.
Credit where it belongs
I had to fly to Los Angeles before the edit, which I had flagged in advance, and the editor I usually work with and had recommended for the job was not the one selected. The producer took on the edit himself and solved exactly that problem. The film works because he did.
I mention it because the flattering version of a story like this is that the director had a clever idea on a rooftop and the film happened. The truth is that it took a pilot team who could clear central Shanghai, a rigging solution someone else already owned, an event choreographed to the second, and a producer who saved the edit while I was on another continent. Good work is almost always the sum of a lot of talent, and this one more than most.
Blocking Your Aerial Scene Before Takeoff
The single most common mistake in drone cinematography is treating the drone as a discovery tool. Filmmakers launch, look at the monitor, and chase something interesting. This produces random footage that rarely cuts together.
Professional aerial cinematography starts with a storyboard. Olivier sketches every drone shot on paper before the crew loads a single battery. The shot list specifies the subject, the camera path, the altitude, and the duration. Without this, you waste flight time and end up with unusable footage.
Blocking an aerial scene means deciding where the subject enters the frame and where it exits. A car driving along a coastal road requires a specific approach angle. The drone must lead the car, follow it, or track alongside it. Each choice tells a different story. Leading the subject builds anticipation. Following it creates a sense of pursuit. Tracking alongside establishes equality and connection.
Use Google Earth or satellite imagery to scout locations before you arrive. Mark the exact GPS coordinates where the drone will begin and end each move. This pre-visualization step is free and saves hours on set. The FAA requires you to maintain visual line of sight, so your blocking must account for obstacles like power lines, trees, and buildings.
Olivier insists on a rehearsal flight at half speed before recording the real take. The rehearsal confirms the path is clear and the framing works. It also lets the subject practice their timing. A subject that reaches the mark too early or too late ruins the shot. Rehearsal costs nothing but a few minutes of battery time and prevents reshoots that cost thousands.
For complex sequences, use a physical marker on the ground to show the subject where to walk, drive, or stand. A simple cone or piece of tape works. The drone operator then flies the path while the subject hits their marks. This method is borrowed from traditional film blocking and translates perfectly to drone cinematography.
The Three Camera Movements That Define Professional Drone Cinematography
Drone cinematography relies on three fundamental camera movements: the reveal, the tracking shot, and the orbit. Each one serves a specific narrative function. Master these three and you can shoot 90 percent of professional aerial sequences.
The reveal starts with the camera pointing at something close and uninteresting, then pulls back or rises to show the grand landscape behind it. This movement creates a sense of discovery for the audience. It works especially well for establishing shots in narrative films and documentaries. The key is a slow, steady pull that lasts at least eight seconds. Fast reveals feel jarring and amateur.
The tracking shot follows a moving subject from a consistent distance and angle. This is the bread and butter of drone cinematography for car chases, running scenes, and boat sequences. The drone must maintain a constant speed and altitude relative to the subject. Any variation breaks the illusion of smooth motion. Use the drone’s GPS lock to hold altitude, but control speed manually with the left stick.
The orbit circles around a stationary subject, creating a dynamic sense of place and scale. This movement works for monuments, buildings, or a single character standing in a landscape. The orbit should be slow and wide. A tight orbit at high speed looks like a music video gimmick. A wide orbit at low speed feels cinematic and contemplative.
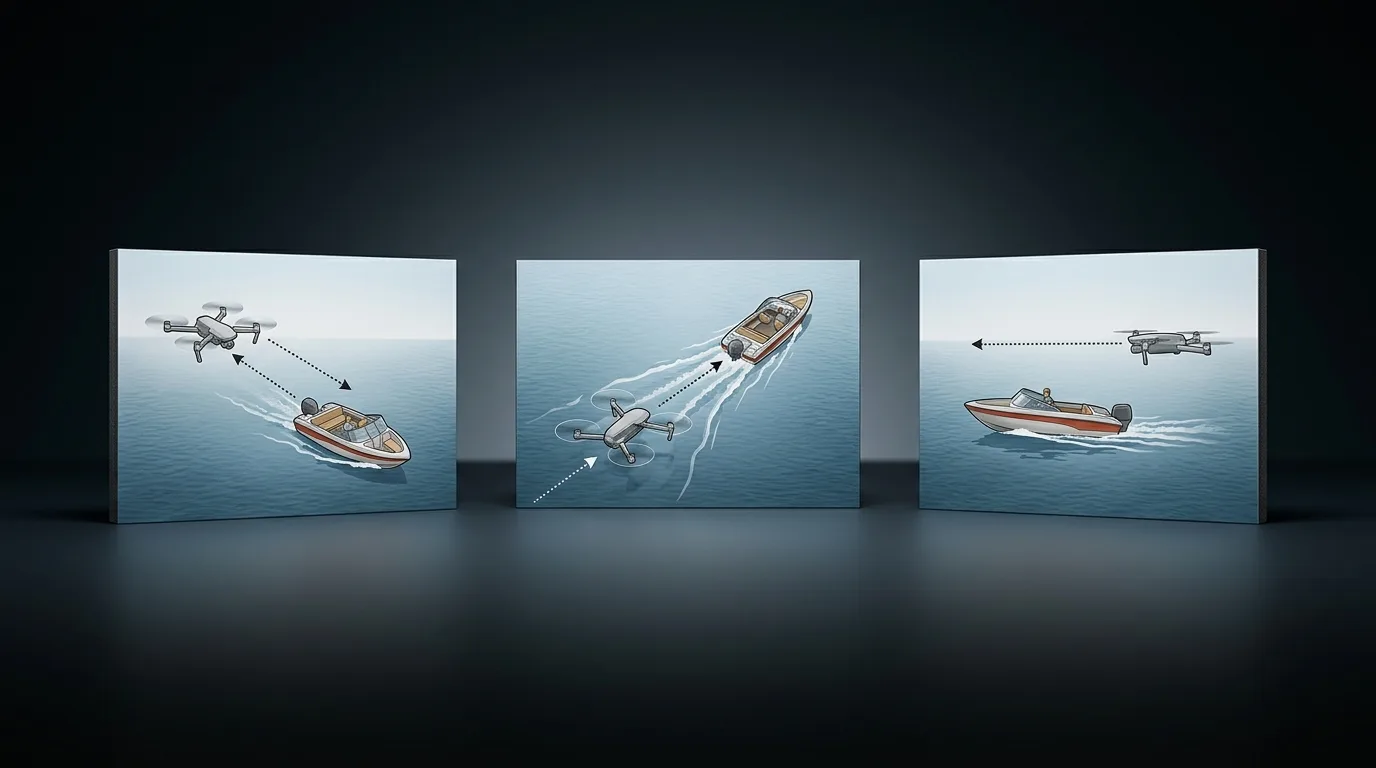
Each of these movements benefits from a gimbal that is properly balanced and calibrated. The DJI RC Pro controller and similar high-end transmitters allow you to adjust the gimbal sensitivity in flight. Set the gimbal response to smooth mode before recording. Jerky gimbal movements are impossible to fix in post-production.
Combining these three movements within a single flight creates complex sequences. Start with a reveal to establish the location, transition into a tracking shot as the subject moves, then finish with an orbit around the destination. This three-act structure within a single battery charge produces a complete narrative arc.
Practice these movements in an open field before taking them to a real shoot. Fly the same path ten times until the movement becomes muscle memory. The goal is to stop thinking about the controls and start thinking about the composition. When you can fly a smooth orbit while adjusting the gimbal angle with your thumb, you are ready for a client shoot.
Why Golden Hour Is Overrated and How to Shoot in Harsh Light
The golden hour advice for drone cinematography is repeated so often that it has become dogma. Shooting at sunrise or sunset produces beautiful light, but it also limits your shooting window to about 40 minutes. For a commercial shoot with multiple setups, that window is not enough.
Professional drone cinematography happens at all times of day. The secret is knowing how to work with the light you have. Harsh midday sun creates deep shadows and high contrast. This can be an advantage for architectural shots where you want strong geometric patterns. The shadows define the lines of buildings and roads.
Use a circular polarizer filter to cut glare from water, roofs, and foliage. A polarizer reduces reflections and increases color saturation. It also cuts the light entering the lens by about one stop, which can help you achieve a proper exposure in bright conditions. The polarizer must be rotated to the correct angle for each shot. Check the effect on the monitor before recording.
Overcast days are actually ideal for drone cinematography. The clouds act as a giant softbox, diffusing the sunlight and eliminating harsh shadows. Skin tones look more natural, and landscapes appear evenly lit. Many professional aerial cinematographers prefer overcast conditions over clear blue skies. The flat light also makes it easier to color grade in post-production.
Exposure is the single most important camera setting in drone cinematography. Use the histogram on your monitor to check exposure. The histogram should show a balanced curve without clipping at either end. Clipped highlights are lost forever. Clipped shadows can sometimes be recovered, but they introduce noise.
Set your ISO to the lowest native value for your drone’s sensor. For most modern drones, that is ISO 100 or 200. Higher ISO values introduce noise that is especially visible in the sky and shadow areas. Noise in drone footage looks terrible because the camera is far from the subject and any grain is magnified.
Use manual shutter speed to control motion blur. The 180-degree shutter rule applies to drone cinematography just as it does to ground-based cameras. Set your shutter speed to double your frame rate. For 24 frames per second, use a shutter speed of 1/50th of a second. This creates natural motion blur that makes movement look smooth and cinematic. Faster shutter speeds produce staccato, jarring motion that looks like a video game.
ND filters are essential for achieving the 180-degree shutter rule in bright conditions. An ND16 or ND32 filter reduces the light entering the lens enough to keep the shutter speed at 1/50th in full sunlight. Without ND filters, your drone cinematography will look like cheap news footage.
The Silent Partner: Designing Audio for Aerial Sequences
Drone cinematography produces no usable audio. The drone’s propellers generate a loud, constant buzz that drowns out all other sound. Beginners often leave the drone audio in the timeline, thinking it adds realism. It does not. It sounds like a vacuum cleaner.
🎥 Hero’s Essentials, The cameras, lenses, software, and tools I actually use on productions. Curated by a working filmmaker. See the full list →
Professional drone cinematography requires sound design that is built from scratch. The audio track for an aerial sequence typically consists of three layers: ambience, Foley, and music. Ambience is the sound of the environment. A coastal shot needs ocean waves and wind. A city shot needs distant traffic and sirens. These sounds ground the image in reality.
Foley sound effects add specific details. If the drone shot shows a car driving along a road, the Foley track includes the car’s engine and tires on the pavement. If the shot shows a person walking, add footsteps on the appropriate surface. These sounds are recorded separately in a studio or sourced from a library.
Music ties the sequence together. The musical score should match the emotional tone of the aerial footage. A slow, rising string section works for a reveal shot. A driving percussion track suits a fast tracking shot. The music should not compete with the ambience and Foley. Mix the audio so that the ambience sits at a low level, the Foley is clear but not prominent, and the music carries the emotional arc.
The sound design for drone cinematography often uses a technique called “whoosh” effects. A whoosh is a short, rising sound that accompanies a camera movement. When the drone tilts up to reveal a landscape, a subtle whoosh sound reinforces the motion. This technique is borrowed from science fiction films and works surprisingly well for aerial footage.
Use a dedicated audio editing tool like Adobe Audition or DaVinci Resolve’s Fairlight module to build your sound design. Start with the ambient track, layer the Foley, then add the music. Adjust the levels until the audio feels natural and supports the image. The audience should not notice the sound design. If they do, it is too loud or too complex.
One common mistake is adding too much low-frequency rumble to drone shots. The drone’s own sound is already low-frequency. Adding more rumble creates a muddy, unpleasant listening experience. Keep the low end clean and use mid-range and high-frequency sounds for clarity.
Olivier’s studio uses a library of field recordings collected specifically for aerial sequences. These recordings include wind through trees, water flowing, and birds flying. Using authentic sounds rather than generic library effects makes the drone cinematography feel more immersive and real.
Post-Production Workflow That Saves Your Drone Cinematography
The post-production workflow for drone cinematography is different from ground-based footage. Aerial shots have unique color characteristics, motion artifacts, and stabilization requirements. Ignoring these differences produces footage that looks amateur no matter how good the flying was.
Start with stabilization. Even the best drone pilots introduce micro-jitters from wind gusts and gimbal vibrations. Use a stabilization plugin like Gyroflow or the built-in stabilization in DaVinci Resolve. Apply stabilization to every clip before grading. The stabilization should be subtle. Over-stabilization creates a floating, unnatural look that is worse than the original jitter.
Color grading drone footage requires careful attention to the sky. The sky is often overexposed or underexposed relative to the ground. Use a graduated mask to adjust the sky exposure separately from the ground. This technique mimics the effect of a graduated ND filter on a traditional camera. The mask should follow the horizon line precisely.
Drone sensors, especially on consumer drones, have limited dynamic range. The shadows and highlights compress quickly. Use a log color profile if your drone supports it. DJI’s D-Log M and D-Cinelike profiles preserve more detail in the shadows and highlights than standard profiles. Log profiles require grading in post-production, but the extra effort is worth it for professional results.
Noise reduction is critical for drone cinematography. The small sensor in most drones produces visible noise in the shadows, especially at higher ISOs. Use a dedicated noise reduction tool like Neat Video or DaVinci Resolve’s built-in noise reduction. Apply noise reduction to the shadows only, leaving the midtones and highlights untouched. Over-aggressive noise reduction creates a plastic, artificial look.
Sharpening drone footage is a trap. Drone cameras are already sharp, and adding more sharpening creates halos and artifacts. Use a very light sharpening pass or skip it entirely. The goal is natural-looking footage, not hyper-detailed images that look like a video game.
Export settings for drone cinematography should match the delivery requirements. For web delivery, use H.264 or H.265 codec at a bitrate of at least 50 Mbps for 4K footage. For broadcast or cinema delivery, use ProRes or DNxHR. The export should preserve the frame rate and resolution of the original footage. Do not upscale drone footage unless you have a specific reason.
One advanced technique is to use a reference frame from a ground-based camera to match the color of the drone shot. If you shot the same scene from the ground and the air, use the ground shot as a color reference. This ensures consistency across the edit and makes the aerial shots feel like part of the same film.
Navigating 2026 Regulations Without Killing Your Creative Flow
Drone cinematography in 2026 operates under a mature regulatory framework. The FAA’s Part 107 rules in the United States and EASA‘s regulations in Europe are well established. Ignoring them is not an option for professional work. The fines and legal liability are too high.
Every commercial drone pilot must hold a valid remote pilot certificate. The Part 107 test covers airspace classification, weather, loading, and emergency procedures. The test is not difficult, but it requires study. Olivier’s studio requires every pilot to recertify every 24 months. The rules change, and staying current is part of the job.
Airspace restrictions are the biggest obstacle to creative drone cinematography. Controlled airspace around airports requires prior authorization through the LAANC system. The authorization process takes minutes for most locations, but it must be done before the flight. Flying without authorization in controlled airspace can result in fines of up to $27,500.
National parks, state parks, and many city parks prohibit drone flights. The prohibition is absolute in most cases. There is no waiver process for recreational or commercial flights in national parks. Filmmakers must find alternative locations or use ground-based cameras. This restriction has driven the growth of helicopter and fixed-wing aerial cinematography for high-budget productions.
Privacy laws in 2026 are stricter than they were five years ago. Filming people without their consent from the air is illegal in many jurisdictions. The drone cinematographer must obtain model releases from any recognizable person in the shot. For crowd scenes, this is impractical. The solution is to shoot from a distance where individuals are not identifiable or to use a location where the public has no reasonable expectation of privacy.
Insurance is non-negotiable for professional drone cinematography. Liability insurance covers damage to property and injury to people. Hull insurance covers the drone itself. The cost of insurance has dropped as the technology has matured, but it is still a significant expense. A typical policy for a commercial drone operation costs between $1,000 and $3,000 per year.
Night flying is permitted under Part 107 with the proper lighting. The drone must have anti-collision lights visible for at least three miles. The pilot must complete a night flight training course. Night drone cinematography produces stunning visuals, especially with city lights or starry skies. The reduced ambient light requires higher ISO settings, so noise management is even more critical.
The regulatory landscape in 2026 also includes remote ID requirements. Every drone must broadcast its location and identification to authorities. Remote ID modules are built into most modern drones. Older drones can be retrofitted with an external module. Flying without remote ID is illegal and can result in grounding of the aircraft.
Understanding the regulations is not optional. It is a core skill for professional drone cinematography. The best aerial shot in the world is worthless if it lands you in legal trouble. Plan your flights with the regulations in mind, and always carry your certification and insurance documents on set.
Choosing the Right Drone for Narrative Work
The drone market in 2026 offers more options than ever, but not every drone is suitable for narrative cinematography. The choice of platform determines the quality of the image, the flexibility of the camera, and the reliability of the flight. Choosing the wrong drone wastes money and produces mediocre footage.
The DJI Mavic 3 Pro remains the gold standard for professional drone cinematography in 2026. Its triple-camera system offers a 4/3 CMOS sensor for the main camera, a 1/2-inch sensor for the medium telephoto, and a 1/2-inch sensor for the telephoto. The main camera shoots 5.1K video at 50 frames per second and supports Apple ProRes internally. The 4/3 sensor provides the dynamic range and low-light performance that narrative work demands.
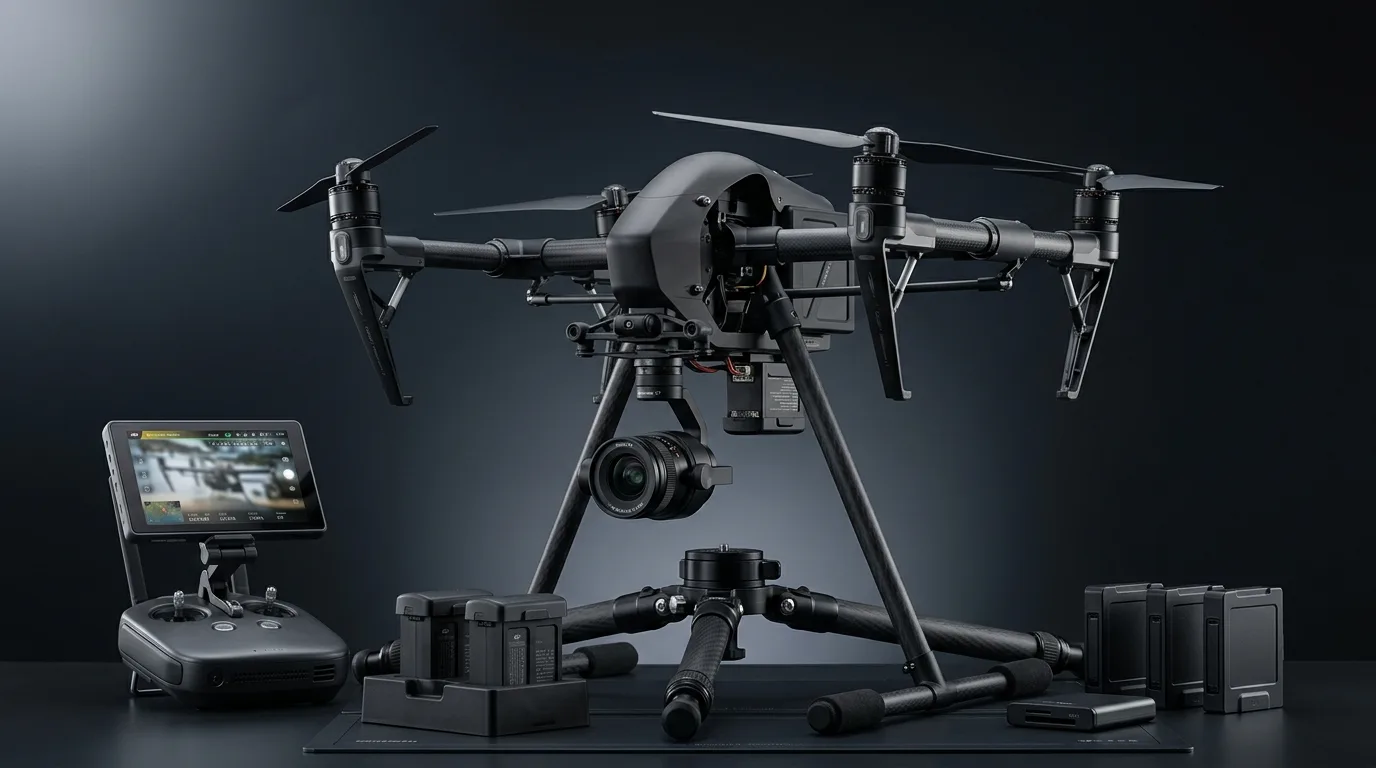
For higher-budget productions, the DJI Inspire 3 with the Zenmuse X9-6K gimbal camera is the standard. The Inspire 3 is a full-frame cinema drone that shoots 6K raw video. Its interchangeable lens mount accepts Leica M-mount lenses, giving the cinematographer control over focal length and aperture. The Inspire 3 is not a consumer drone. It requires a separate pilot and camera operator. But for narrative films and high-end commercials, it is the only choice.
The Autel Robotics EVO Max 4T is a strong competitor in the commercial space. Its 4K camera with a 1-inch sensor produces excellent image quality. The EVO Max 4T offers 360-degree obstacle avoidance and a 40-minute flight time. Its software is less mature than DJI’s, but the hardware is solid. Many filmmakers choose Autel for projects where DJI’s Chinese ownership is a client concern.
For lightweight and travel-friendly drone cinematography, the DJI Mini 4 Pro is surprisingly capable. Its 1/1.3-inch sensor shoots 4K video at 100 frames per second. The Mini 4 Pro weighs under 250 grams, which exempts it from some registration requirements in many countries. The image quality is not as good as the Mavic 3 Pro, but for social media content and low-budget projects, it is a workable option.
Battery management is a critical part of gear selection. A typical flight lasts 20 to 30 minutes. A professional shoot requires at least six batteries to cover a day of filming. Battery chargers that support multiple batteries simultaneously are essential. Olivier’s studio uses a six-battery charging hub that charges all batteries in sequence. The hub also discharges batteries to storage voltage when not in use, extending their lifespan.
ND filter sets are mandatory for any drone used for narrative work. A set of ND4, ND8, ND16, and ND32 filters covers most lighting conditions. Some filters combine ND and polarizer functions. These are convenient but less effective than separate filters. Buy filters from reputable brands like PolarPro or Freewell. Cheap filters introduce color casts and reduce sharpness.
Spare propellers, a landing pad, and a sun hood for the monitor complete the gear kit. The landing pad prevents dust and debris from being kicked up during takeoff and landing. The sun hood allows the pilot to see the monitor in bright conditions. These small accessories make a significant difference in the quality of the footage and the efficiency of the shoot.
How to Create Cinematic Looks Without Expensive ND Filters
ND filters are the standard tool for achieving cinematic motion blur in drone cinematography, but they are not the only tool. Filmmakers on a budget or in situations where filters are not available can still create professional-looking drone footage using in-camera settings and post-production techniques.
The first alternative is to use a higher frame rate and a slower shutter speed in post-production. Shoot at 60 frames per second with a shutter speed of 1/120th of a second. In post-production, interpret the footage to 24 frames per second. The software blends the frames, creating the appearance of motion blur. This technique is not perfect, but it produces acceptable results for web delivery.
Another technique is to shoot in a lower resolution and use digital zoom to crop the frame. The crop reduces the apparent motion, making the footage look smoother. This is a hack, not a solution, but it works in a pinch. The trade-off is reduced resolution and a narrower field of view.
Use the drone’s aperture control to reduce the light entering the lens. Many drones have a fixed aperture, but higher-end models like the Mavic 3 Pro offer adjustable aperture from f/2.8 to f/11. Closing the aperture reduces the amount of light, allowing a slower shutter speed. The trade-off is increased depth of field and potential diffraction at very small apertures.
Post-production motion blur plugins offer a third option. Plugins like ReelSmart Motion Blur or the built-in motion blur effect in DaVinci Resolve analyze the movement in the frame and add artificial blur. The result is not as natural as optical motion blur, but it is better than the staccato look of high shutter speeds. Apply the blur selectively to moving elements, not the entire frame.
The color grading workflow can also create a cinematic look without expensive hardware. Use a LUT (Look Up Table) designed for drone footage. LUTs from companies like Dehancer or FilmConvert emulate the color science of film stocks. Apply the LUT as a starting point, then adjust the contrast, saturation, and white balance to match your creative vision.
Grain is another element of the cinematic look. Add a subtle film grain overlay in post-production. The grain masks the digital sharpness of the drone sensor and gives the footage a organic texture. Use a grain preset that matches the film stock you are emulating. The grain should be barely visible. If the audience notices it, it is too strong.
The most important element of a cinematic look is not the equipment. It is the composition and the movement. A well-composed shot with smooth, purposeful movement looks cinematic regardless of the camera settings. Focus on the story you are telling, and the technical details will follow.
When to Leave the Drone on the Ground
The most important lesson in drone cinematography is knowing when not to use a drone. Aerial shots are powerful because they are rare. If every shot in your film is from the air, the audience becomes numb to the perspective. The drone shot loses its impact.
Drone cinematography excels at establishing shots, transitions, and moments of scale. Use it to show the audience where the story takes place. Use it to move from one location to another. Use it to emphasize the vastness of a landscape or the isolation of a character. For everything else, use a ground-based camera.
Close-up shots of characters are impossible from a drone. The drone is too far away to capture facial expressions and emotional nuance. Do not try to shoot a character’s reaction from 50 feet in the air. It will look like surveillance footage, not cinema. Keep the drone at a distance and use a traditional camera for intimate moments.
Interior shots are also off-limits for drone cinematography. Flying a drone inside a building is dangerous, noisy, and impractical. The prop wash stirs up dust and knocks over objects. The confined space makes maneuvering difficult. Use a gimbal on a tripod or a handheld camera for interior shots. The drone stays in the case.
Low-light conditions are another reason to leave the drone on the ground. Drone sensors struggle in low light. The noise and loss of dynamic range produce unusable footage. If the sun has set, pack up the drone and use a camera with a larger sensor. The DJI Inspire 3 with its full-frame sensor can handle some low-light situations, but even it has limits.
Wind speeds above 20 miles per hour make drone cinematography difficult and dangerous. The drone fights to maintain position, and the gimbal cannot compensate for the vibrations. The footage will be shaky and the risk of a crash increases significantly. Check the weather forecast before every flight. If the wind is too strong, reschedule the shoot.
Finally, consider the cost-benefit ratio of a drone shot. A single aerial shot might require 30 minutes of setup, 10 minutes of flight time, and an hour of post-production. If that shot does not advance the story or enhance the visual experience, it is not worth the effort. Every drone shot should earn its place in the edit.
Olivier’s rule is simple: if the shot works from the ground, shoot it from the ground. The drone is a specialized tool for a specific purpose. Using it for every shot is like using a sledgehammer to drive a finishing nail. It works, but it leaves a mess.
Curious what gear I use? Check out Hero’s Essentials, my curated list of filmmaker tools and equipment.
Frequently Asked Questions
Do I need a license for commercial drone cinematography?
Yes. In the United States, the FAA requires a Part 107 remote pilot certificate for any commercial drone operation. In Europe, EASA requires a similar certification. The test covers airspace rules, weather, and flight operations. You must be at least 16 years old and pass a written exam.
What is the best drone for narrative filmmaking in 2026?
The DJI Mavic 3 Pro offers the best balance of image quality, portability, and cost for most narrative projects. Its 4/3 CMOS sensor and 5.1K video capability produce professional results. For higher budgets, the DJI Inspire 3 with the Zenmuse X9-6K full-frame camera is the industry standard.
How do I avoid shaky drone footage?
Use a drone with a three-axis gimbal and fly in smooth mode. Avoid flying in wind speeds above 20 miles per hour. In post-production, apply stabilization using Gyroflow or DaVinci Resolve. The stabilization should be subtle to avoid the floating effect.
Can I fly a drone in national parks?
No. The National Park Service prohibits drone flights in all national parks. The ban includes takeoff, landing, and overflight. Violations can result in fines and confiscation of the drone. Use a helicopter or fixed-wing aircraft for aerial shots in national parks.
What frame rate should I use for drone cinematography?
Use 24 frames per second for cinematic narrative work. This frame rate matches traditional film and creates the characteristic motion blur. For slow-motion sequences, shoot at 60 or 120 frames per second and interpret the footage to 24 frames per second in post-production.
Discover more from Olivier Hero Dressen Blog: Filmmaking & Creative Tech
Subscribe to get the latest posts sent to your email.
Work with Olivier
Director | CD | DP & Photographer
Specializing in commercials, music videos, AI-driven filmmaking, and cinematic storytelling for brands and production companies.
🌍 Shanghai · Paris · Los Angeles · Dubai
🎬 View Portfolio & Get in Touch