

Key Takeaways: The Physics-First Approach
- Stop prompting for objects, start prompting for physics – Lens types, aperture settings, and film stocks create realism, not adjectives like “ultra-detailed”
- Lighting dictates mood – Technical terms like Rembrandt lighting, anamorphic flares, and global illumination produce professional results
- Texture control requires specificity – For authentic skin and fabric, specify focal length and camera sensor (Arri Alexa, Sony A7R IV)
- FLUX.1 vs Midjourney v7 – FLUX excels at technical accuracy and organic grain; Midjourney dominates emotional mood and stylized lighting
In 2025, the barrier to entry for AI art has vanished, but the gap between “generic AI” and professional art direction has never been wider. If you want your AI-generated images to look like they were pulled from a $100M film set rather than a stock photo site, you need to stop prompting for “objects” and start prompting for physics.
Need a Director for Your Next Project?
From commercials to branded campaigns—Olivier brings creative vision and technical expertise.
→ View ProjectsAs a filmmaker who’s spent years on actual film sets working with real cameras, lenses, and lighting equipment, I’ve discovered that the secret to cinematic AI art isn’t more adjectives, it’s understanding how light, lenses, and film stock actually work. The AI models have been trained on millions of professional photographs and films. When you speak their technical language, they respond with professional results.
This guide will show you exactly how to transition from being a “prompter” to an art director, using the same terminology that cinematographers and photographers use on real productions.
Why “Photorealistic” Doesn’t Work Anymore
Here’s the problem with most AI prompts: they’re descriptive rather than technical. When you write “ultra-realistic, highly detailed, photorealistic,” you’re not actually telling the AI how to achieve realism, you’re just asking it to try harder.
Real photographers and cinematographers don’t think in adjectives. They think in:
- Aperture (f/1.4, f/2.8, f/8) – controls depth of field
- Lens type (35mm, 85mm, anamorphic) – controls perspective and character
- Film stock (Kodak Portra 400, Fuji Pro 400H) – controls color and grain
- Lighting setup (Rembrandt, butterfly, three-point) – controls mood and dimension
When you prompt with these technical specifications, you’re accessing the AI’s training data of actual professional photography, not the generic “realistic” category that’s been diluted by millions of amateur attempts.
Let’s dive into the seven prompts that will transform your AI art from amateur to professional.
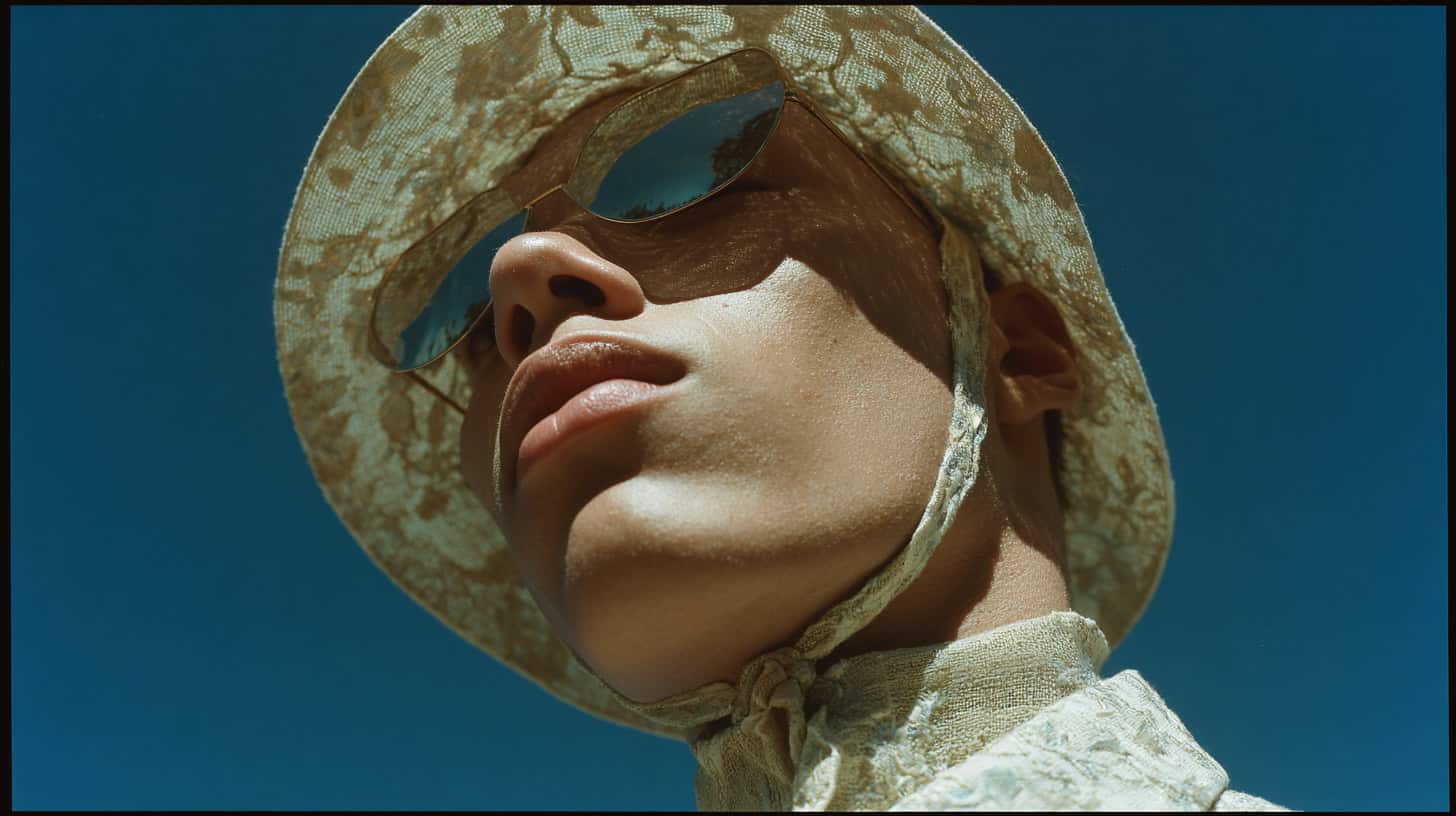
1. The “Polarized” Fashion Editorial: Controlling Light & Color
The Challenge: Most AI models struggle with outdoor lighting, creating that telltale “hazy” or “washed-out” look that screams “AI-generated.”
The Solution: A circular polarizer lens (CPL) is a physical filter that photographers screw onto their lenses to reduce reflections and atmospheric haze while deepening color saturation, particularly in skies and water. By prompting for this specific optical tool, you’re telling the AI to calculate light paths differently.
The Prompt:
A high-end outdoor fashion editorial, model wearing textured linen, shot through a circular polarizer lens, deep saturated cerulean sky, intense contrast with sharp high-noon highlights, Kodak Portra 400 film aesthetics, 35mm, crisp edges, zero haze, authentic film grain, shot on Leica M11, f/2.8Why it works: The keyword “circular polarizer” forces the AI to pull from high-end fashion photography training data where this tool is standard. The result is cleaner, more professional commercial photography that avoids the typical AI softness.
Pro tip: Combine “Kodak Portra 400” with “Leica M11” to get that specific film-digital hybrid aesthetic that’s popular in contemporary fashion.
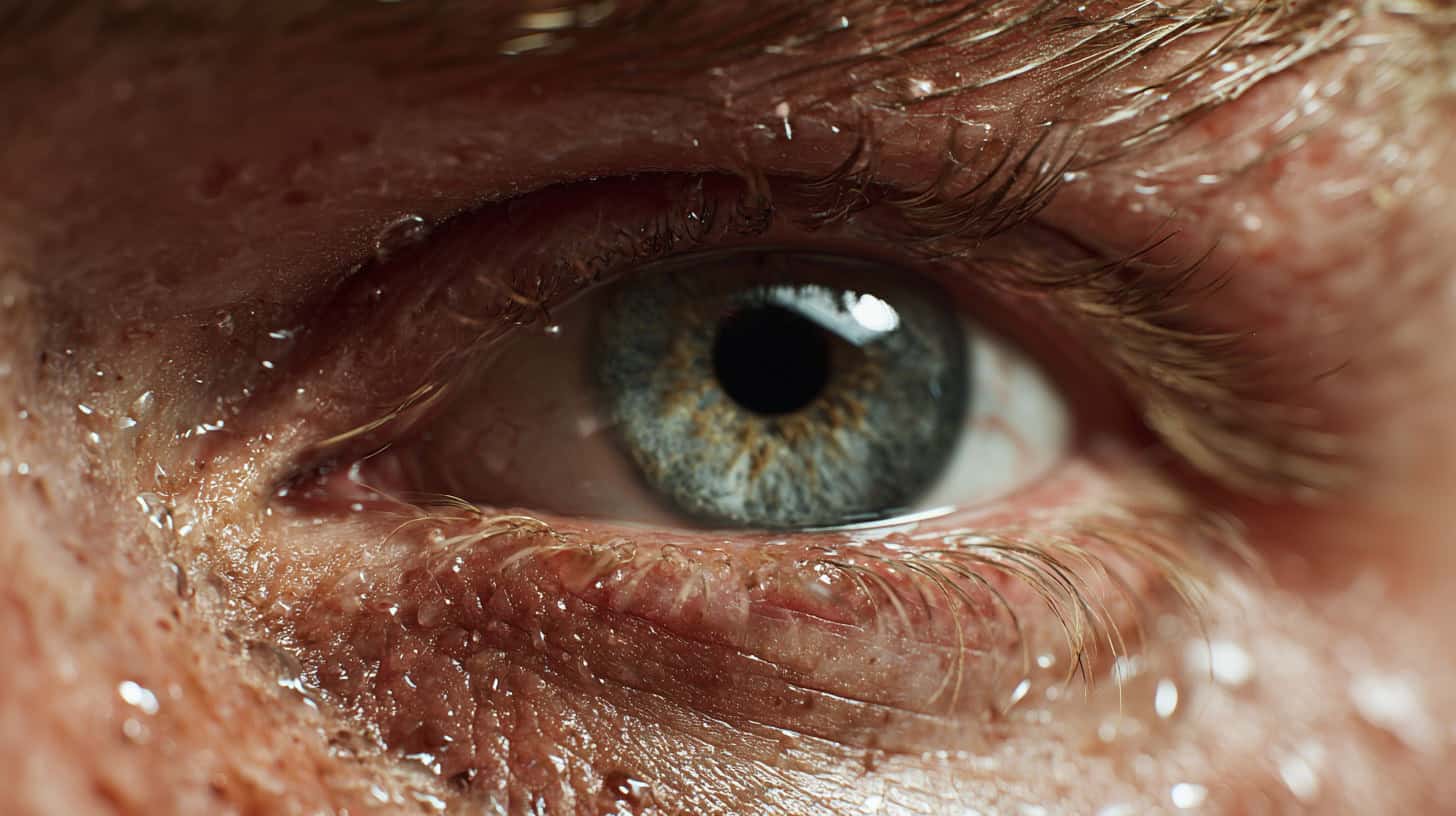
2. The “Micro-Detail” Human Texture: Mastering Macro Realism
The Challenge: The dreaded “AI plastic skin” – that overly smooth, waxy appearance that immediately identifies an image as AI-generated.
The Solution: Instead of asking for “realistic skin,” prompt for the specific lens and optical properties that would capture micro-level detail in real photography.
The Prompt:
Extreme macro close-up of a human face, focus on micro-pores and fine vellus hair (peach fuzz), moisture droplets on the skin, a reflection of a softbox in the pupil, 100mm macro lens, f/2.8, shallow depth of field, authentic sub-surface scattering, shot on Sony A7R IV with 61MP sensor, hyper-realistic skin texture, natural skin imperfections, 8K resolutionWhy it works: Specifying “vellus hair” (the technical term for peach fuzz) and “100mm macro” triggers the model to pull from training data of high-resolution medical and portrait photography. The “Sony A7R IV” reference connects to a specific sensor known for capturing micro-detail. “Sub-surface scattering” is the technical term for how light penetrates and diffuses through human skin, using this term produces the translucent quality real skin has.
Technical note: The f/2.8 aperture creates shallow depth of field, keeping the focus tack-sharp on the skin texture while softly blurring the background.
3. The “Anamorphic Night”: The Filmmaker’s Signature
The Challenge: Creating that instantly recognizable “cinematic” look that separates Hollywood productions from everything else.
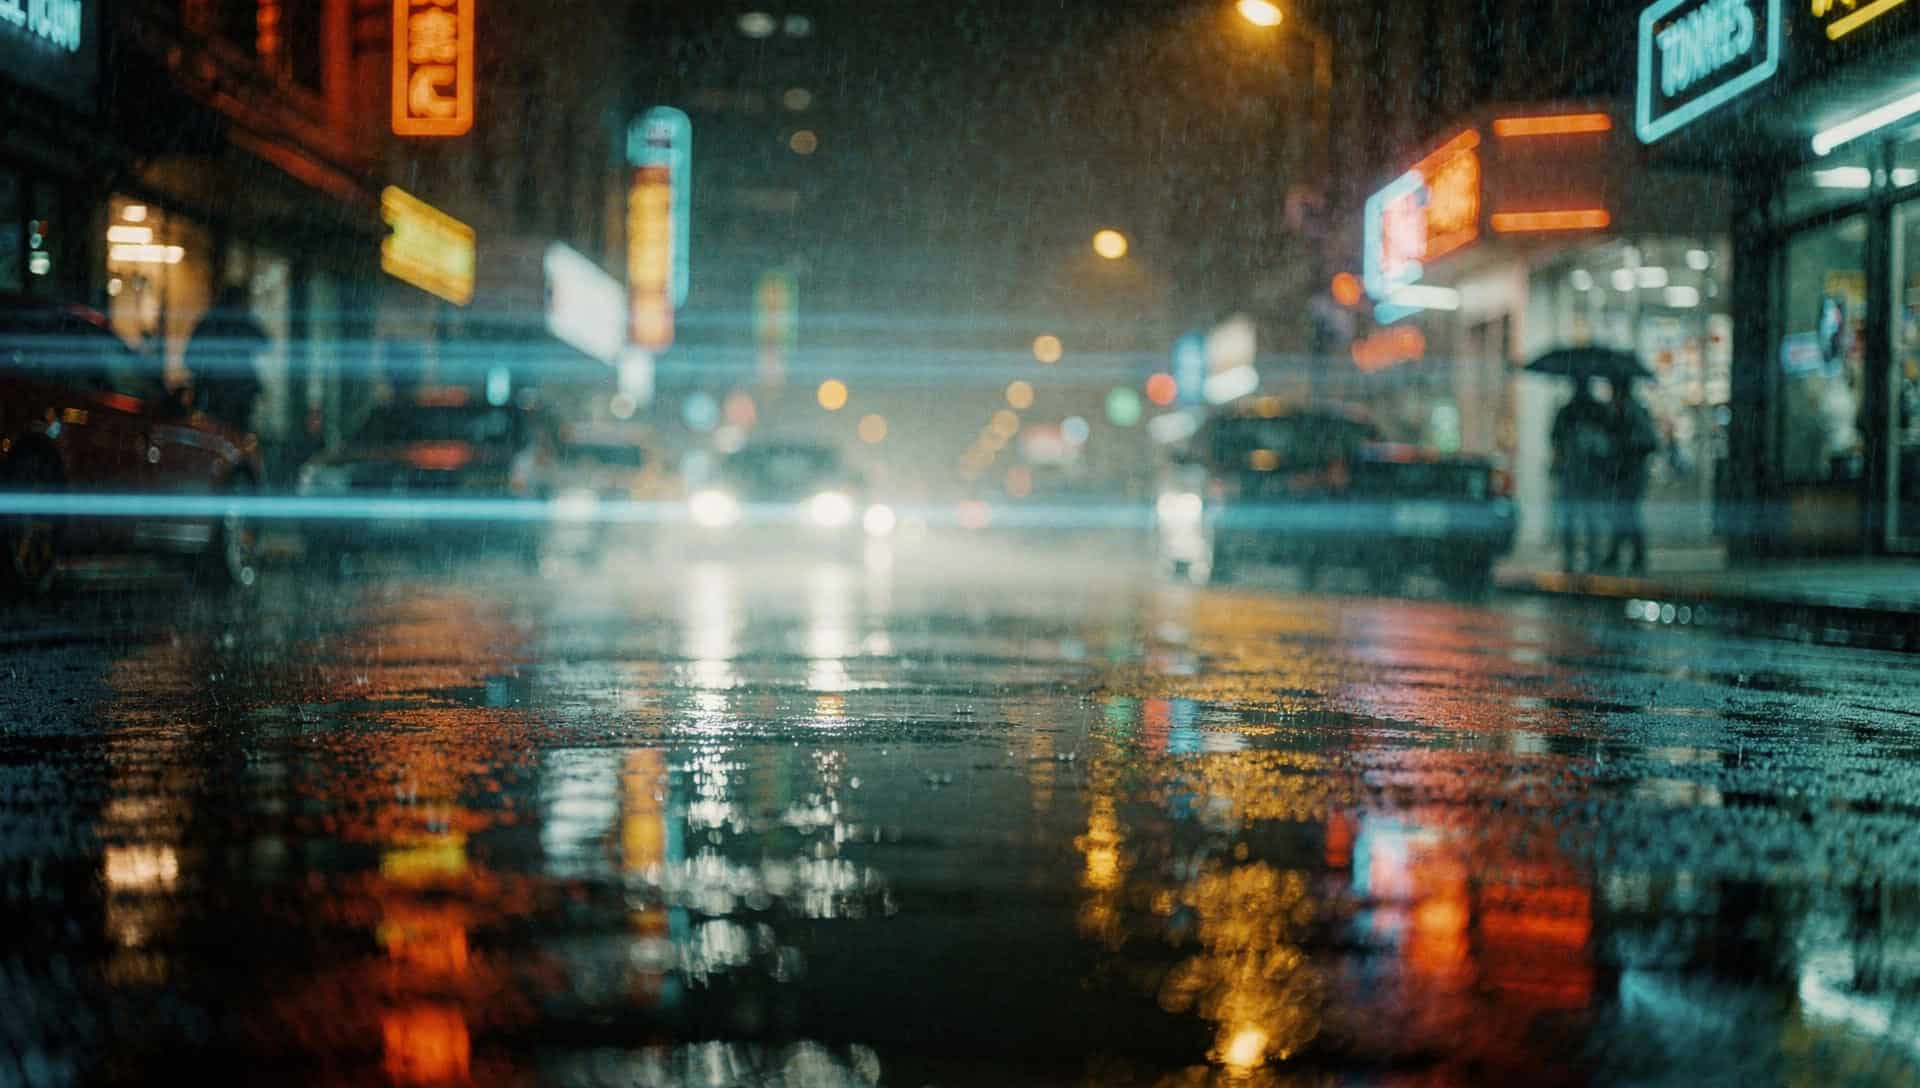
The Solution: Anamorphic lenses create the horizontal lens flares and oval bokeh characteristic of high-end cinema. These lenses physically squeeze the image, creating a specific optical signature.
The Prompt:
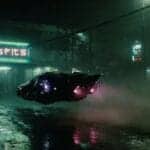
A cinematic street scene at night in the rain, anamorphic lens flares, horizontal blue light streaks, heavy oval bokeh, wet asphalt reflecting neon signage, T-stop 2.0, shot on Panavision C-Series anamorphic lenses, 35mm anamorphic 2.39:1 aspect ratio, cinematic teal and orange color grade, heavy atmospheric haze, film grainWhy it works: “Panavision” and “anamorphic” are powerful tokens that immediately change how the AI renders light “blooms” and bokeh shapes. The “T-stop 2.0” (cinema lenses use T-stops instead of f-stops) and “2.39:1 aspect ratio” reinforce the cinematic training data. The “teal and orange” color grade is the signature Hollywood look.
Pro tip: For FLUX, add “Panavision C-Series” for more authentic flare patterns. For Midjourney, “anamorphic bokeh” is the key trigger.
4. The “Rembrandt” Portrait: Mastering Classic Lighting
The Challenge: Creating depth, dimension, and mood in portrait photography without it looking flat or artificially lit.
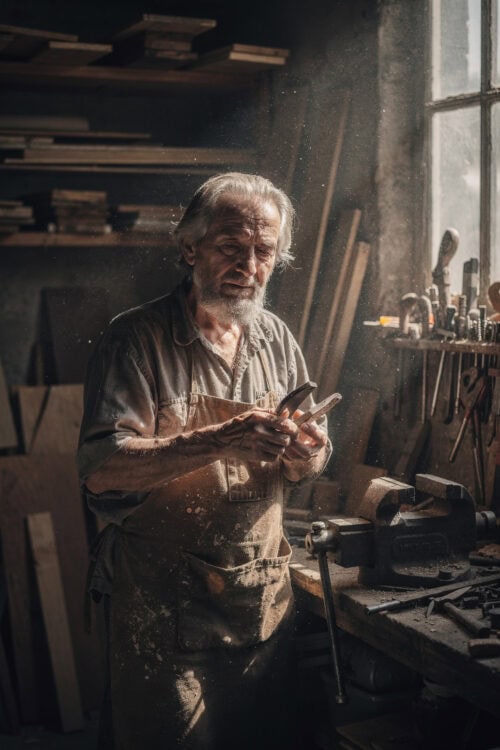
The Solution: Rembrandt lighting is a classical portrait technique where light creates a triangle of light on the subject’s cheek. It’s named after the Dutch painter who used this lighting pattern in his portraits.
The Prompt:
A portrait of an elderly artisan in a dim workshop, Rembrandt lighting setup, soft dust particles dancing in a single beam of light from a high window, deep shadows on one side of face, triangle of light on opposite cheek, textures of worn wood and rusted metal tools, chiaroscuro, 10-bit color grade, moody atmosphere, shot on Arri Alexa Mini with 85mm lens, f/1.8, natural window lightWhy it works: “Rembrandt lighting” is a specific technical term that cinematographers and photographers use. The AI has thousands of examples of this lighting setup in its training data. Adding “chiaroscuro” (the artistic term for strong contrast between light and dark) reinforces the dramatic mood. “10-bit color grade” references professional cinema color depth.
Lighting breakdown: The key light comes from above at a 45-degree angle, creating the signature triangle. The “dust particles” add atmospheric depth and make the light source visible.
5. The “Product Glamour”: Commercial Photography Perfection
The Challenge: Product photography needs to be clean, sharp, and professionally lit, but AI often produces muddy backgrounds or inconsistent lighting.
The Solution: Use the exact lighting setup that commercial photographers employ: a three-point lighting system with specific modifiers.
The Prompt:
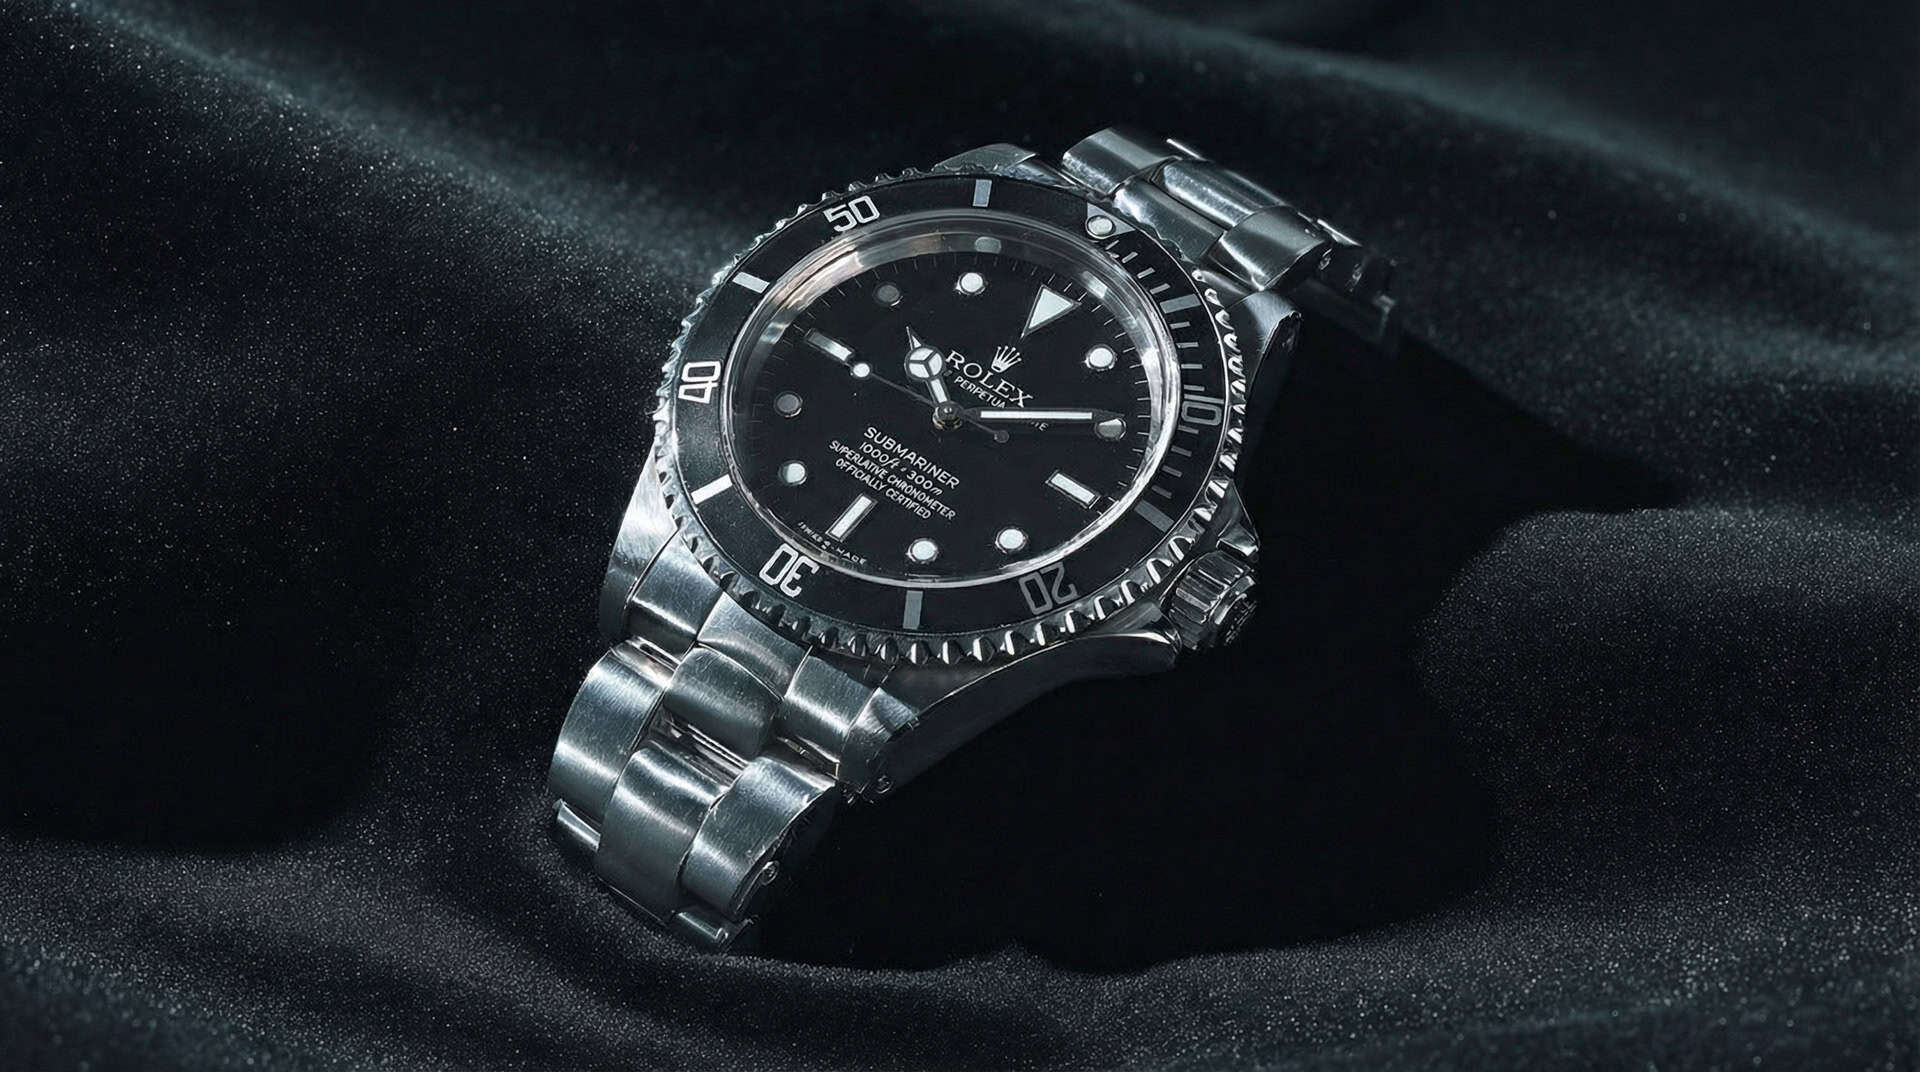
High-end product photography of a luxury watch on a black velvet surface, three-point lighting setup with softbox key light, rim light creating edge definition, perfectly controlled reflections on metal surface, shot on Phase One XF IQ4 150MP medium format camera, 90mm macro lens, f/11 for maximum sharpness, studio strobe lighting, clean white background option, commercial advertising quality, zero shadows, crisp detailWhy it works: “Three-point lighting” is the foundation of professional studio work. The “Phase One XF IQ4” is the gold standard of commercial photography cameras. “f/11” is the sweet spot aperture for product photography where the entire product is in sharp focus. “Softbox” and “rim light” are specific lighting modifiers that create the polished commercial look.
Pro tip: “Zero shadows” and “clean white background” are keywords that trigger the AI’s training on e-commerce and advertising photography.
6. The “Golden Hour” Cinematic Landscape
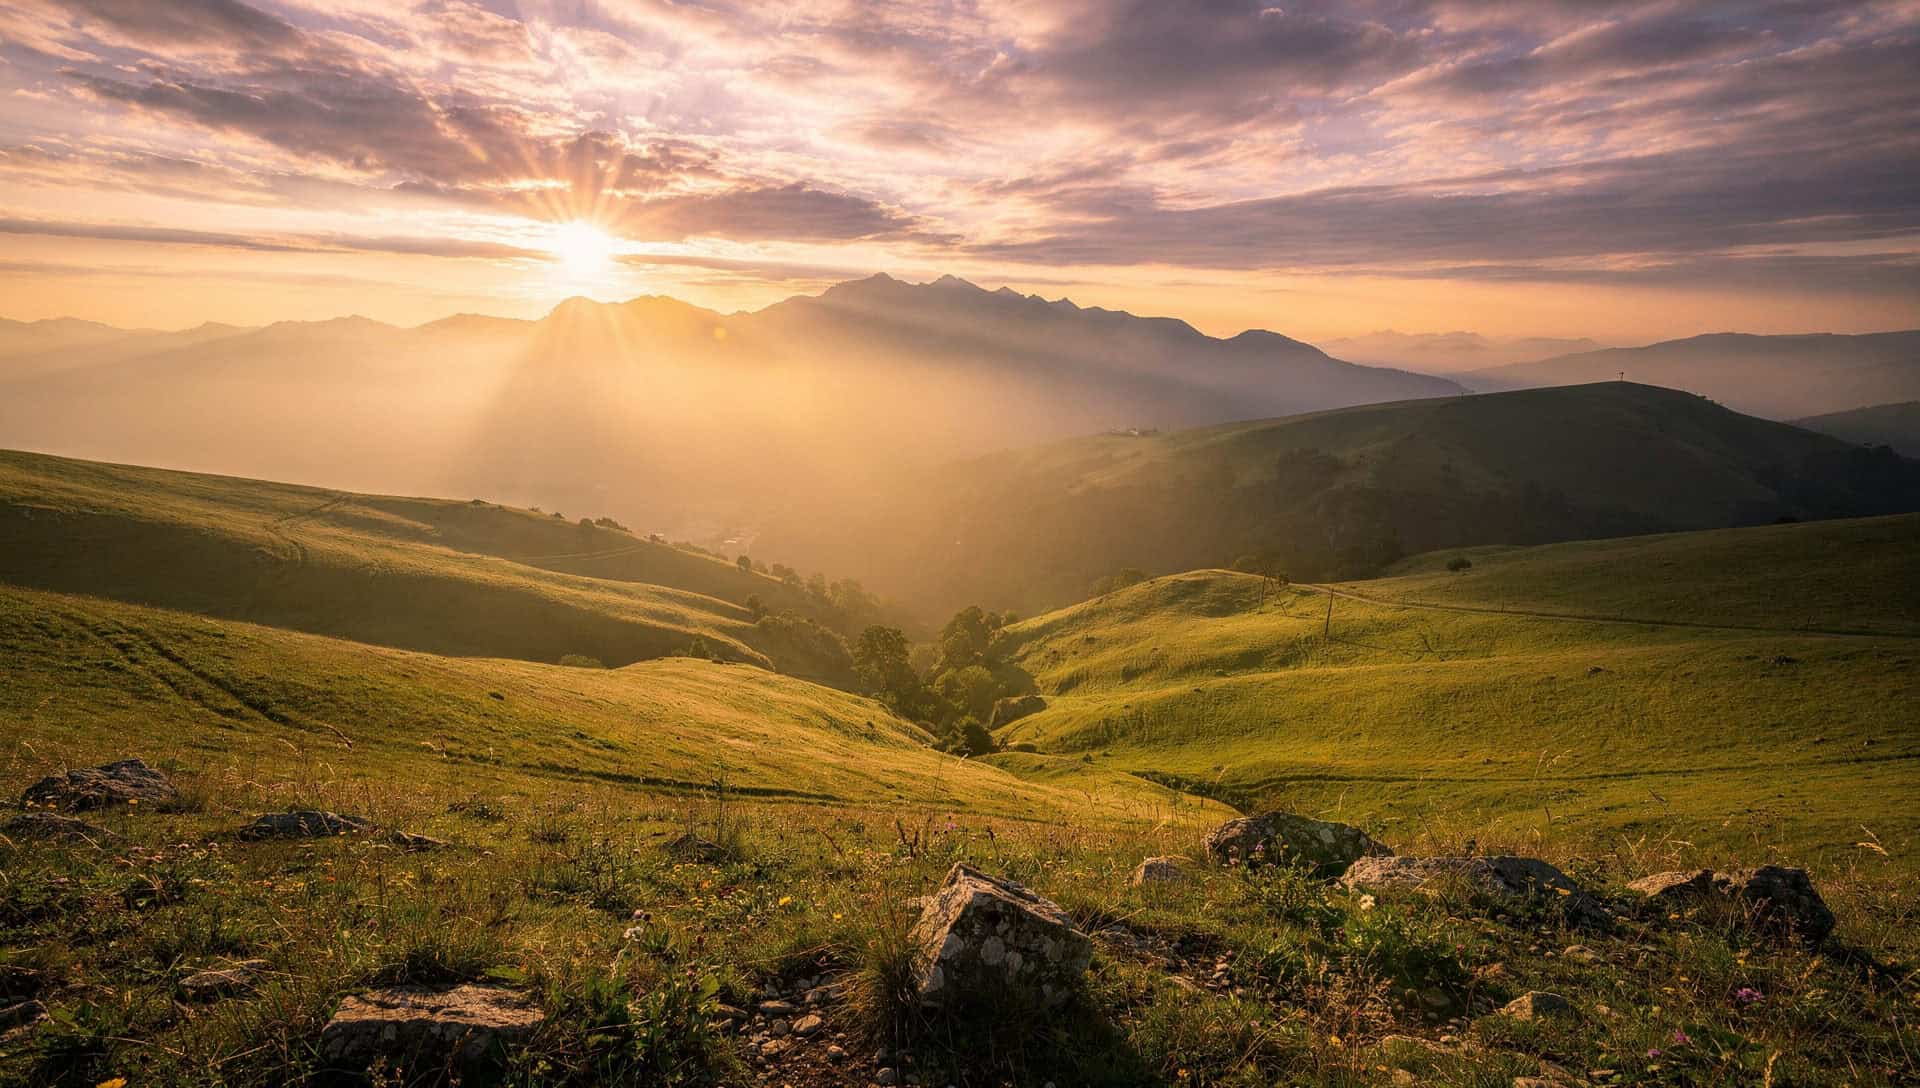
The Challenge: Capturing that magical quality of light during the “golden hour” (the hour after sunrise or before sunset) that gives landscapes a warm, ethereal glow.
The Solution: Reference specific atmospheric conditions, sun angle, and the optical phenomena that occur during this time.
The Prompt:
Epic cinematic landscape shot during golden hour, sun at 15-degree angle above horizon, warm amber and magenta tones in sky, long shadows stretching across rolling hills, atmospheric haze creating layers of depth, lens flare from sun hitting edge of frame, shot on RED Komodo 6K with Zeiss Supreme Prime 25mm lens, f/8 for deep focus, natural ND filter, rich dynamic range, professional color science, sweeping vistaWhy it works: “15-degree angle” is the specific sun position during golden hour. “Atmospheric haze creating layers” describes the physical phenomenon that creates depth in landscape photography. “RED Komodo” and “Zeiss Supreme Prime” are specific cinema cameras and lenses. “Natural ND filter” (neutral density) explains how photographers manage the bright sun while maintaining proper exposure.
Color science: The “amber and magenta tones” are the specific color shifts that occur during golden hour, not just “warm” or “sunset colors.”
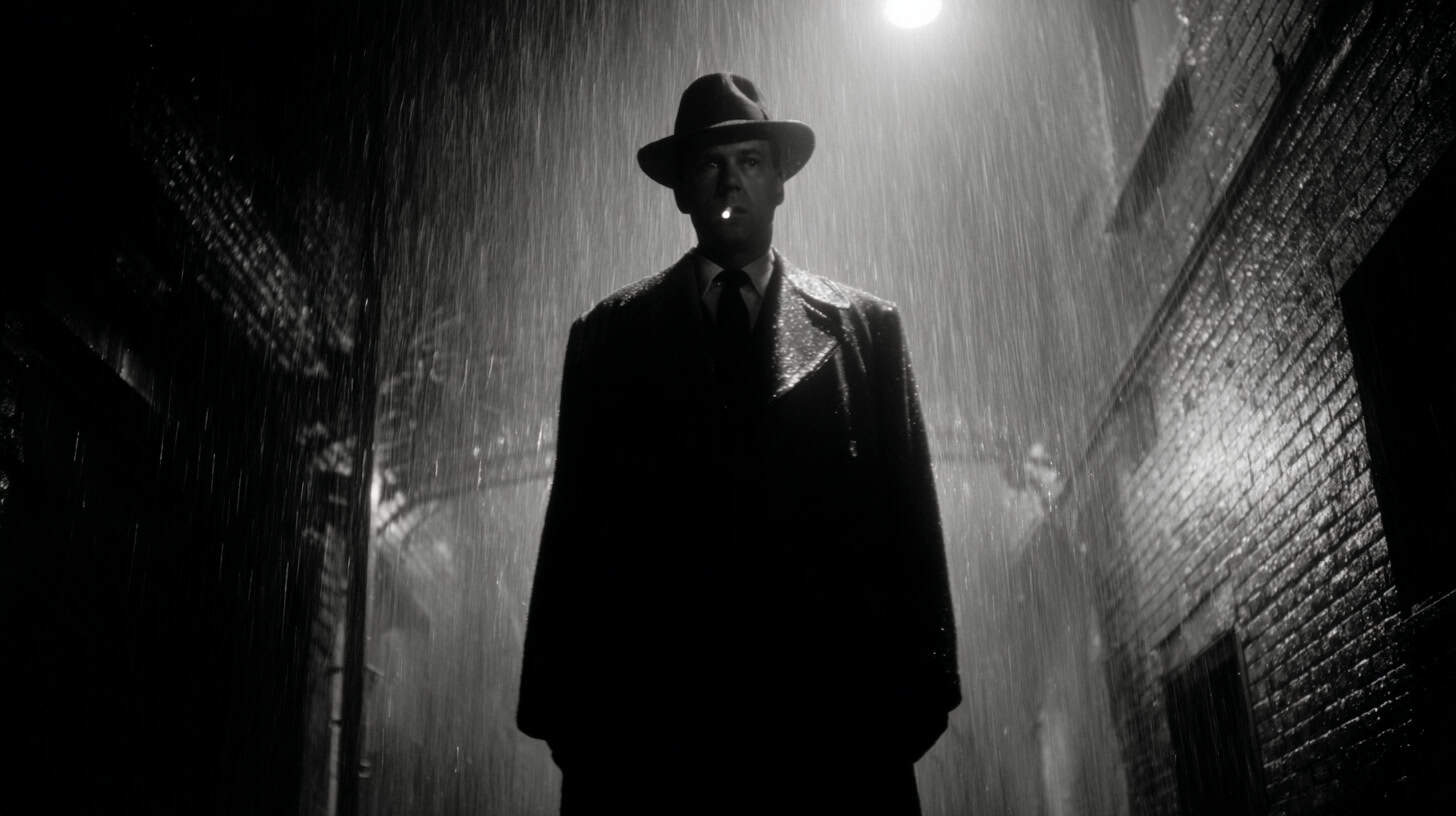
7. The “Film Noir” High-Contrast Drama
The Challenge: Creating the dramatic, high-contrast black and white aesthetic of classic film noir without it looking like a simple desaturation filter.
The Solution: Reference specific film stocks, lighting ratios, and the optical characteristics of vintage cinema lenses.
The Prompt:
Film noir style scene, 1940s detective in rain-soaked alley, harsh single-source street lamp creating deep shadows and bright highlights, 10:1 lighting ratio, venetian blind shadow patterns, cigarette smoke catching light, shot on vintage Cooke Panchro lenses, Kodak Double-X black and white film stock, high contrast silver halide grain structure, classic noir cinematography, deep blacks and blown-out highlights, moody atmosphereWhy it works: “10:1 lighting ratio” is the technical term for the dramatic contrast between lit and shadowed areas. “Kodak Double-X” is the actual black and white film stock used in classic noir cinema. “Cooke Panchro” lenses have a specific vintage optical character. “Silver halide grain structure” describes the physical grain pattern of film, not digital noise.
Noir elements: “Venetian blind shadows” and “cigarette smoke catching light” are signature noir visual motifs that the AI recognizes from classic films.
FLUX.1 vs Midjourney v7: Which Model for Which Style?
After extensive testing with both models, here’s what each excels at:
FLUX.1 [dev] Strengths:
- Technical accuracy – Handles specific camera settings and lens characteristics more precisely
- Film grain – Produces more organic, authentic film grain that matches specific film stocks
- Text rendering – Better at incorporating readable text elements when needed
- Micro-detail – Superior for extreme close-ups and texture work
- Photorealistic portraits – More consistent with human anatomy and skin texture
Best for: Commercial photography, product shots, technical photorealism, fashion editorials
Midjourney v7 Strengths:
- Stylized lighting – Creates more dramatic, artistic lighting that feels emotionally powerful
- Mood and atmosphere – Better at capturing “vibe” and emotional tone
- Artistic interpretation – More creative with composition and color
- Speed – Faster generation times for iteration
- Consistent style – Easier to maintain a specific aesthetic across multiple images
Best for: Cinematic concept art, atmospheric storytelling, artistic portraits, mood boards
Pro workflow: Use FLUX for technical hero shots and final assets. Use Midjourney for rapid concept exploration and mood development.
The Art Director’s Mindset: Beyond Individual Prompts
The real secret to mastering cinematic AI art isn’t memorizing these seven prompts, it’s understanding the framework behind them:
1. Think in Camera Settings First
Before you describe what’s in the image, decide:
- What lens would a real photographer use for this shot?
- What aperture creates the depth of field I want?
- What’s the lighting setup?
2. Reference Real Equipment
Specific camera models, lens manufacturers, and film stocks aren’t just technical jargon, they’re portals to specific training data. “Shot on Arri Alexa” connects to thousands of high-end cinema images. “Leica M10” connects to street photography masters.
3. Understand Light Physics
- Hard light = small source, sharp shadows (spotlight, sun)
- Soft light = large source, gradual shadows (softbox, overcast day)
- Direction matters = front light flattens, side light creates dimension, back light creates silhouettes
4. Control Color Through Technical Means
Instead of “warm colors” say “shot on Kodak Portra” or “tungsten white balance with daylight film.” Instead of “cool tones” say “shot on Fuji Pro 400H” or “moonlight with blue gel.”

Advanced Techniques: Combining Multiple Elements
Once you master individual technical elements, you can combine them for even more sophisticated results:
Layered Lighting:
Portrait lit with key light through diffusion fabric, kicker light with CTO gel for warm edge, hair light from above with barn doors for controlled spill, fill light at 4:1 ratio, shot on...Atmospheric Control:
Heavy atmospheric haze at 30% opacity, god rays visible through smoke, practical lights in background creating depth layers, motivated lighting from window source...Film Stock Mixing:
Kodak Vision3 500T color negative pushed one stop for increased grain, cross-processed for elevated contrast, vintage lens aberrations...Common Mistakes to Avoid
1. Overloading with Adjectives
❌ “Ultra realistic, highly detailed, photorealistic, professional, sharp, clear, amazing” ✅ “Shot on Sony A7R IV, 85mm lens, f/1.4, natural window light”
2. Mixing Incompatible Technical Terms
❌ “Shot on iPhone with anamorphic Panavision lenses” ✅ Pick one: either smartphone aesthetic OR cinema lenses, not both
3. Ignoring Physical Constraints
❌ “100mm macro lens, wide-angle field of view” ✅ Understand what each lens type actually does
4. Generic Film References
❌ “Film look, film grain” ✅ “Kodak Portra 400, medium format 6×7, Hasselblad”
Tools and Resources for Art Directors
For Learning Camera Techniques:
- Hero’s Essentials: Gear & Tools – Real filmmaking equipment and how to use it
- Filmmaking AI Workflows – Integrating AI into professional pipelines
For Visual Development:
- Midjourney Mastery Guide – Deep dive into cinematic AI art
- AI Render Pro – Advanced prompt generation
Support Our Work:
Creating these in-depth technical guides takes significant time and expertise. Support our filmmaking projects by checking out our unique merchandise collection.

What’s Next? The Future of AI Art Direction
The conversation is rapidly shifting from “AI art” to “AI cinematography.” In 2026, we’ll see:
Prompt-to-Video Workflows – Using these photorealistic prompts as keyframes for Runway Gen-3 and Sora video generation
Consistent Character Systems – Maintaining the same character across multiple scenes with controlled lighting and camera angles
Real-Time Art Direction – Interactive adjustment of lighting, camera, and atmosphere in real-time
Physical Accuracy Validation – AI models that can verify if your lighting setup is physically possible
Want me to cover any of these topics in depth? Let me know in the comments which aspect of cinematic AI art direction you want to explore next.
Frequently Asked Questions
What’s the difference between prompting and art direction?
Prompting is describing what you want in an image. Art direction is controlling how the image is captured, the technical and optical properties that create a specific look. Art directors think in camera settings, lighting setups, and film stocks, not adjectives.
Can I use these prompts in both FLUX and Midjourney?
Yes! These prompts work in both systems, though you may need minor adjustments. FLUX responds better to extremely technical specifications, while Midjourney sometimes needs simplified technical terms. Start with the full prompt and remove elements if needed.
Do I need to understand real photography to use these?
Not required, but it helps! Understanding why a cinematographer chooses f/2.8 over f/8, or what Rembrandt lighting actually looks like, will help you make better creative decisions. The prompts work even if you don’t understand the technical terms, but understanding makes you more powerful.
Which film stocks should I reference for different looks?
- Natural skin tones, warm colors: Kodak Portra 400 or 800
- Cool tones, muted colors: Fuji Pro 400H
- High contrast, punchy: Kodak Ektar 100
- Black and white, classic: Kodak Tri-X or Double-X
- Cinema: Kodak Vision3 500T (tungsten) or 5219 (daylight)
Why do specific camera models matter in prompts?
Camera models are connected to entire genres of photography in the AI’s training data. “iPhone 15 Pro” connects to social media and documentary styles. “Arri Alexa” connects to high-end cinema. “Hasselblad” connects to fashion and fine art. It’s not about the camera, it’s about the visual language associated with that camera.
How can I learn more about cinematography techniques?
Check out our Filmmaking AI Workflows guide and Hero’s Essentials for real-world cinematography knowledge. Understanding actual filmmaking makes your AI art direction exponentially better.
Internal Links for Further Learning
- Master AI image generation with 10 Insanely Powerful Midjourney Prompts for Character Design
- Explore cutting-edge techniques in 10 ‘Impossible’ FLUX.2 Prompts
- Understand the full AI creative pipeline with Filmmaking AI Workflows
- Get professional results with AI Render Pro
- Learn the fundamentals in the Midjourney Mastery Guide
- Discover the gear behind great visuals in Hero’s Essentials: Gear & Tools
- Support our work with unique creative merchandise
Conclusion: From Prompter to Art Director
The difference between amateur AI art and professional results isn’t talent or luck, it’s knowledge. By thinking like a real cinematographer and speaking the technical language of cameras, lenses, and light, you unlock a level of control that most AI users never discover.
These seven prompts aren’t just copy-paste formulas, they’re frameworks for understanding how professional visual language translates into AI generation. Master the principles behind them, and you’ll be able to art-direct any scene, any mood, any style.
The future of AI art belongs to those who understand both technology and craft. Now go create something cinematic.
From the podcast
If you are writing prompts for a video model, it is worth knowing what the model brings to the prompt on its own.
Rachel Nexus put it to DeepSeek: the language you type your prompt in moves the camera. Ask in English and you get a face. Ask in Chinese and you get the room.
Chinese AI Filmmaking: What the West Gets Wrong — DesignHero TV, the podcast where an AI host interviews other AI models about filmmaking.
Discover more from Olivier Hero Dressen Blog: Filmmaking & Creative Tech
Subscribe to get the latest posts sent to your email.
Work with Olivier
Director | CD | DP & Photographer
Specializing in commercials, music videos, AI-driven filmmaking, and cinematic storytelling for brands and production companies.
🌍 Shanghai · Paris · Los Angeles · Dubai
🎬 View Portfolio & Get in Touch