
Key Takeaways: Cinematography Secrets for Pro-Level Footage
Need a Director for Your Next Project?
From commercials to branded campaigns—Olivier brings creative vision and technical expertise.
→ View Projects- Master essential cinematography secrets that transform amateur footage into professional, cinematic visuals without upgrading your camera.
- Use strategic lens choices and powerful composition techniques to create scroll-stopping images your audience actually remembers.
- Control depth of field to direct viewer attention like a professional cinematographer and guide the story within every frame.
- Leverage camera angles, shot sizes, and camera movement to add psychological depth and make even simple scenes feel intentional and cinematic.
Cinematography secrets separate professional filmmakers from amateurs. I’ve watched countless filmmakers and content creators obsess over cameras and specs while overlooking the fundamental cinematography techniques that actually make footage cinematic. The truth? Your 5-year-old camera can create stunning visuals if you master just a few core principles.
In this guide, you’ll learn how to use lens selection, composition, depth of field, shot sizes, camera angles, and camera movement to create cinematic footage that looks intentional and professional. These aren’t textbook basics you’ve heard a hundred times, but the subtle cinematography secrets that separate amateur footage from production-ready work.
Whether you’re shooting short films, music videos, YouTube content, or AI-generated visuals, these 25+ cinematography techniques will give you a practical toolbox you can apply on any project, with any camera, starting today.
1. The Lens Focal Length Psychology Most People Miss
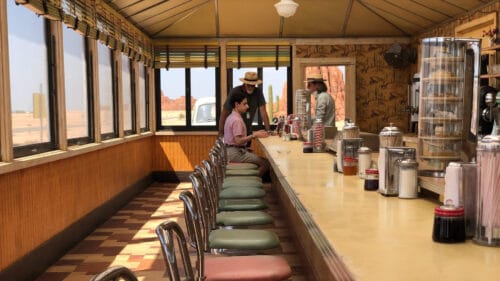
Everyone knows that wide lenses (16–35mm) show more of the scene and telephoto lenses (85mm+) compress space. But here’s what most people miss about cinematography: focal length is an emotional language. The lens you choose quietly tells the audience how close they should feel to your subject.
A 24mm lens doesn’t just capture more environment, it creates psychological distance, making subjects feel small and vulnerable in their world. This is why Wes Anderson uses symmetrical wide-angle shots in his visual language: they create a doll-house effect that feels both intimate and detached.
Conversely, an 85mm or 135mm lens doesn’t just blur backgrounds beautifully, it creates intimacy and immediacy. When you compress space with a longer lens, you’re literally bringing the viewer closer to your subject’s emotional state, eliminating distractions. This is the secret sauce behind those dreamy fashion films and emotional interviews that feel like you’re sitting across from someone in a coffee shop.
2. Breaking the Rule of Thirds (Strategically)
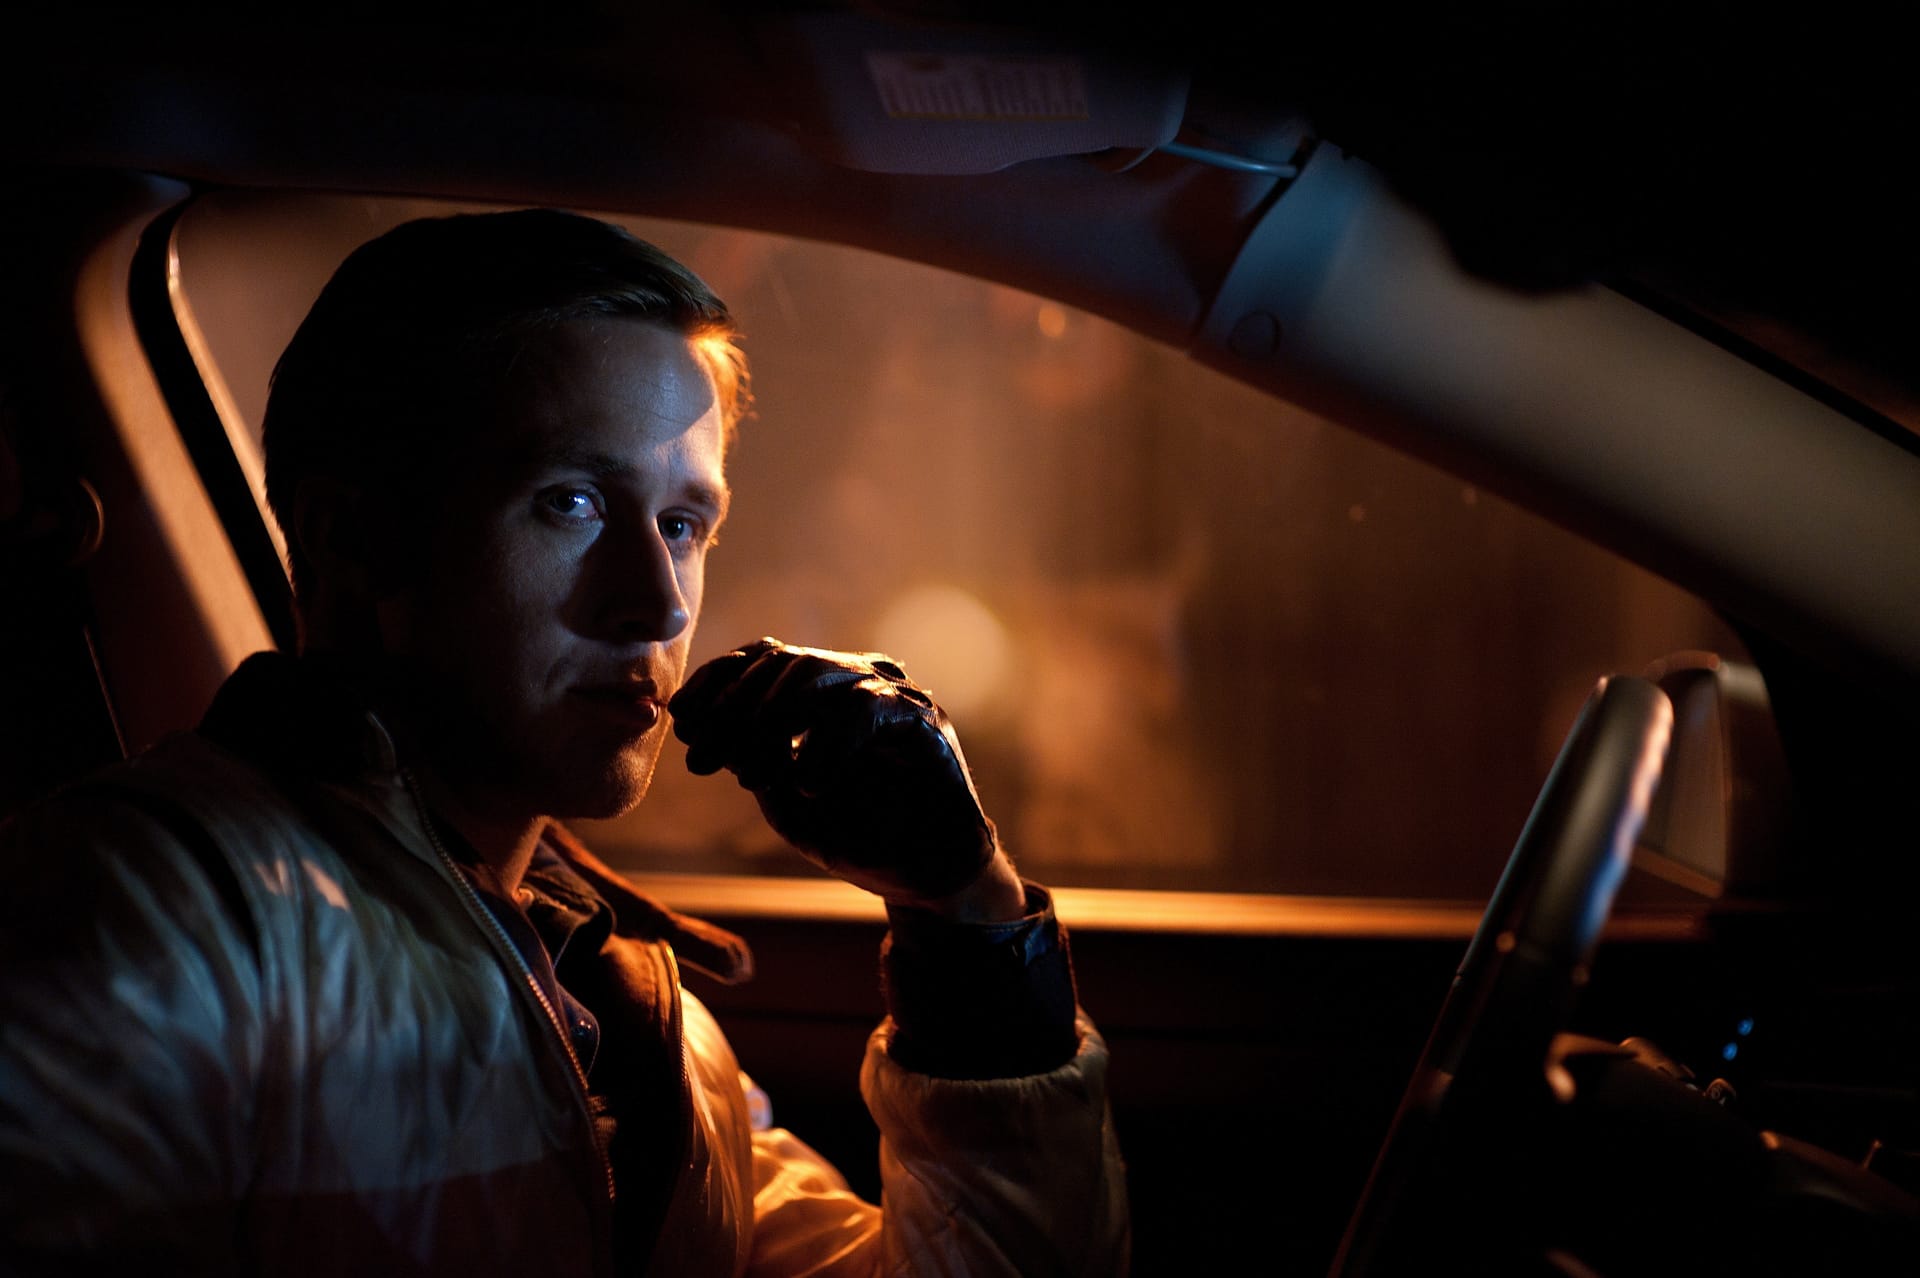
The rule of thirds is a fantastic starting point for cinematography, but it’s also where most people stop. Here’s a more advanced approach: use negative space as a narrative tool. Instead of always placing your subject on the third intersection, try positioning it in the extreme corner or edge of the frame with massive negative space on the opposite side. This filmmaking technique, used brilliantly in films like “Lost in Translation” and “Drive,” creates visual tension and suggests isolation, contemplation, or longing.
Another underutilized cinematography secret is leading lines that go nowhere. We’re taught that leading lines should guide the eye to the subject, but what if they intentionally lead away? Roads disappearing into fog, hallways with no visible end, or architectural elements that point off-screen create unease and anticipation. It’s a subtle way to keep viewers emotionally engaged without them consciously knowing why.
Finally, master the “breathing room” technique in your cinematography secrets arsenal. When a subject is moving or looking in a direction, give them more space in that direction than behind them. If you want to create discomfort or foreshadow danger, reverse this. Put all the space behind them and crop tight in the direction they’re facing. It subconsciously tells the audience “something’s wrong here,” even in an otherwise normal scene.
3. Depth of Field: The Cinematography Secrets Attention Director
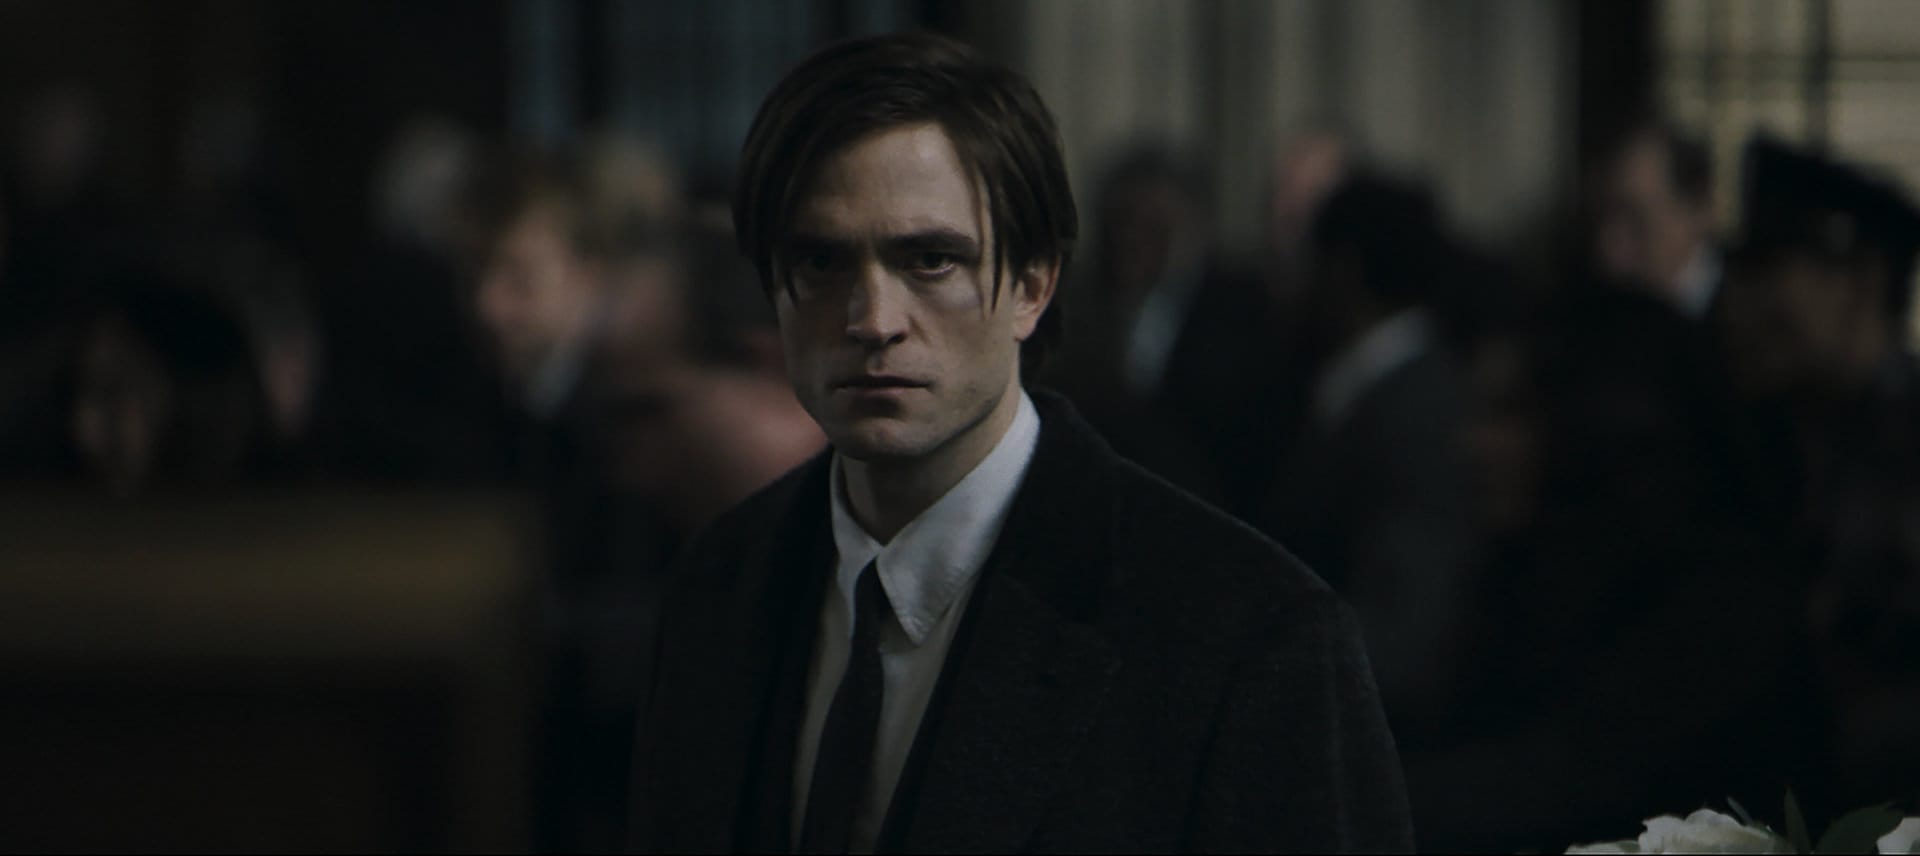
Most creators understand shallow depth of field as “that nice blurry background,” but professional cinematography secrets reveal a deeper truth: depth of field is how you tell the audience what to think about. In a conversation scene, rack focus (shifting focus between subjects) isn’t just technically interesting, it’s literally showing whose perspective we’re taking or whose reaction matters more in that moment.
Here’s a powerful move: use deep depth of field in emotional scenes. When everything changes and everything is in focus, the viewer has to actively choose where to look, which creates engagement and realism. According to the American Society of Cinematographers, this technique forces viewers to become active participants rather than passive observers.
You can also use focus as a storytelling pivot. Hold a character slightly soft while their environment is sharp, then snap them into focus at the exact beat their inner world shifts. It’s a tiny adjustment that instantly adds emotional weight to your cinematography.
4. Camera Angles: Psychological Power in Every Frame
From the authoritative power of a low angle that makes characters feel imposing, to the vulnerable intimacy of a high angle that creates sympathy, each angle carries inherent meaning that transcends dialogue. As No Film School frequently emphasizes, camera angles are one of the most powerful yet underutilized cinematography secrets available to filmmakers.
The Dutch angle (tilted horizon) isn’t just for horror films, used subtly in dramatic scenes, a slight 5–10 degree tilt creates subliminal unease without being obvious. This is one of those cinematography secrets that separates professionals from amateurs: knowing when to break the rules just enough to create emotional impact without drawing attention to the technique itself.
Eye-level shots feel neutral and observational, making them perfect for documentary-style realism. But here’s the secret: break eye-level strategically. Start a conversation at eye level, then slowly lower or raise the camera as the power dynamic shifts. This subtle movement tells the story without a single word of dialogue.
5. AI-Powered Cinematography: The Future of Pre-Visualization
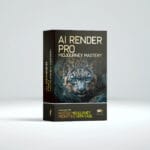
While this guide focuses on cinematography fundamentals, there’s a game-changing tool that deserves special attention: AI Render Pro. For traditional cinematographers, AI Render Pro revolutionizes pre-production by enabling instant previsualization of complex lighting setups, camera angles, and set designs without the time and expense of physical location scouts or elaborate pre-viz sessions.
Whether you’re blocking a scene in Unreal Engine, planning a music video, or developing concept art for a feature film, AI Render Pro transforms cinematography secrets from theoretical understanding into immediate visual results, making professional-quality pre-visualization accessible to creators at every level.
The real power emerges when you combine both worlds: use AI Render Pro to rapidly prototype and test the cinematographic concepts you’ve learned here, iterate through dozens of variations in minutes instead of days, and arrive on set or at your rendering workstation with absolute confidence in your visual approach.
6–10. Framing Techniques That Instantly Feel Cinematic
This video breaks down simple framing tweaks that instantly upgrade your cinematography. Use it as a visual reference, then apply the techniques below on your own shoots or AI boards.
6. Using the Background
Most beginners treat the background as a throwaway, but professionals use it as a storytelling layer. A busy neon city behind a lonely character tells a different story than a flat white wall. The background can mirror the character’s inner world or contrast with it for irony.
Instead of asking “Is the background clean?”, ask “What does this background say about the character?”. Use depth, texture, light sources, and shapes behind your subject to add emotional context. In AI or virtual environments, you have zero excuses, every pixel in the background can be designed with intent.
7. Lens Selection for Framing
Lens choice isn’t just about “wide vs telephoto”. It’s how you sculpt space around your subject. A wide lens pulled close exaggerates perspective and can make the audience feel physically inside the scene. A longer lens from further away flattens space and feels more observational.
On set, try framing the same shot with a 24mm and an 85mm lens from different distances. The subject might occupy the same part of the frame, but the emotional feel will be completely different. In AI, prompt different focal lengths and compare how each version changes the mood of your cinematography.
8. Framing Guidelines You Can Bend
Guidelines like headroom, nose room, and the rule of thirds exist for a reason, they make frames readable and comfortable. But once you understand them, you can start to bend them. Cutting just a bit above the head, or pushing a character slightly off the “correct” position, creates subtle unease.
Use clean, textbook framing in neutral scenes, then break those rules only when the story calls for it. The contrast between “normal” and “wrong” framing will make the emotional shift land harder, without the audience consciously noticing why.
9. Shot Size and Angle as a Pair
Shot size and angle are usually discussed separately, but they become powerful when you treat them as a pair. A low-angle close-up feels aggressive and confrontational. A high-angle wide shot feels distant and observational. You’re not just choosing “close or wide”, you’re choosing how the audience should judge the subject.
When planning coverage, decide which character deserves the more dominant combination (closer + lower) and who should feel smaller or more vulnerable (wider + higher). That simple decision instantly imbues your cinematography with power dynamics.
10. Balance: Symmetry, Asymmetry, and Visual Weight
Balanced frames feel cinematic because the eye quickly understands them. Symmetrical balance, like Kubrick or Wes Anderson, centers the subject and mirrors both sides of the frame, creating a formal, controlled feeling. Asymmetrical balance places the subject off-center but uses other elements, light, or color to keep the frame from feeling lopsided.
Think in terms of “visual weight”. Bright areas, faces, text, and contrast pull attention. You can deliberately disrupt balance for chaos, or keep it extremely controlled for elegance. Once you start seeing visual weight instead of “stuff in the frame”, your compositions level up fast.
11–19. Essential Camera Shots Every Filmmaker Must Know
11. Establishing Shot
An establishing shot is the wide-angle shot that shows your audience where the scene takes place before anything else happens. It can be a city skyline, a street corner, or the exterior of a building before cutting inside. Think of the sweeping city views in “Blade Runner 2049”; you instantly feel the world’s scale and tone.
In low-budget or run‑and‑gun shoots, you can cheat establishing shots with stock footage, drone plates, or AI-generated environments that match your color grade. The key is clarity: in one shot, the viewer should know the location, time of day, and mood of the story.
12. Master Shot
A master shot captures the entire scene in one continuous wide or medium‑wide setup, showing all the characters and their blocking. It’s the “safety net” editors rely on when coverage is imperfect because you can always cut back to the master to re‑anchor geography and performance.
On set, a strong master shot gives actors a chance to play the scene in its entirety, often leading to more natural performances. Even if you plan to cut aggressively to close‑ups, shoot a solid master first and then layer your cinematography secrets on top with tighter coverage.
13. Wide Shot (WS)
A wide shot frames your subject from head to toe while still giving a strong sense of the environment. It’s perfect when you want the character to feel small in a space, like a lone figure in a massive warehouse or a hero facing an overwhelming battlefield.
Use wide shots to show movement, blocking, and spatial relationships. Add foreground elements or strong leading lines to keep the frame from feeling like a static surveillance feed. In AI scenes, a well-designed wide shot can instantly convey production value.
14. Full Shot (FS)
A full shot shows the character from head to toe, but tighter than a wide shot and more focused on the person than the environment. It’s especially useful when body language drives the performance, as in dance scenes, fights, or physical comedy.
Pay attention to headroom and footroom so you don’t accidentally crop joints in awkward places. Full shots are a great “neutral” choice for scenes where characters enter, exit, or interact physically with the space.
15. Medium Full Shot / Cowboy
The medium full, or “cowboy shot”, frames the subject roughly from mid‑thigh up. It became iconic in Westerns because it shows both the face and the gun on the hip, building tension before a showdown.
Today, it’s perfect for hero moments, fashion, or character introductions where pose and attitude matter. In AI or still-based storytelling, cowboy framing gives you enough space for costume and gesture without losing facial expression.
16. Medium Shot (MS)
A medium shot frames your subject roughly from the waist up and is the workhorse of cinematic dialogue. It’s close enough to read expressions but wide enough to include hand gestures and interaction with props.
Use medium shots when you want the audience to feel like they’re in the conversation without intruding. If your mediums feel flat, add depth with layers in the background, motivated light, or subtle camera movement.
17. Medium Close-Up (MCU)
A medium close‑up typically frames from the chest or shoulders up, focusing more on the face without completely losing context. This is where you really start to feel a character’s internal life, micro‑expressions become readable.
Use MCUs to punch key lines or reactions in a dialogue scene. In talking‑head or YouTube content, MCUs strike a perfect balance between intimacy and comfort for the viewer.
18. Close-Up (CU)
A close‑up isolates the face and makes the audience live inside the character’s emotions. Used at the right moment, a close‑up can completely change how viewers interpret a scene.
Because CUs are so intense, use them when something genuinely shifts, realizations, confessions, decisions. Overusing them flattens your visual grammar and makes emotional climaxes feel less special.
19. Extreme Close-Up (ECU)
An extreme close‑up goes tighter, on eyes, lips, hands, or an object detail. It’s about obsession, tension, or symbolism rather than simple coverage. ECUs turn tiny movements into massive cinematic events.
Use ECUs for critical story information (a key twisting, a tear, a text message) or to underline psychological states. In AI work, ECUs are fantastic for stylized, graphic images that also slot into a larger narrative.
20–22. High Angle Shots and Overhead Perspectives
20. High Angle Shot
A high-angle shot looks down on the subject from above, subtly making them feel smaller, weaker, or more exposed. Even a modest height difference can shift the power dynamic between characters.
Use high angles when a character loses control or feels overwhelmed by their situation. On practical shoots, a staircase, balcony, or ladder can give you just enough height to sell the effect.
21. Bird’s-Eye View / Overhead
A bird’s‑eye view is an overhead shot looking straight down on the scene, flattening depth and turning people into graphic shapes. It’s great for choreography, crowd scenes, or moments when you want to show patterns and rhythms.
Films like “Baby Driver” and “La La Land” use overheads to turn movement into design. In AI or drone-style work, overheads can make even simple locations feel stylized and intentional.
22. Extreme High Angle
An extreme high angle pushes the camera very far above the subject, sometimes to the point where they become a small figure in a huge environment. It amplifies themes of isolation, insignificance, or being swallowed by the world.
Use it as a visual punctuation mark: at the end of a scene, after a big decision, or as a transition into a new chapter of the story. In AI scenes, extreme high angles are an easy way to flex scale and production value.
23–35. Camera Movement Techniques That Add Energy
23. Static Shot
A static shot is one in which the camera does not move at all; all motion comes from the actors or the environment. This simplicity can be incredibly powerful when your composition and blocking are strong.
Use static shots to build tension or let performances breathe. In horror, locking the camera while something barely moves in the background is often scarier than any big camera move.
24. Pan
A pan rotates the camera left or right from a fixed position, like turning your head. It’s ideal for following a moving subject or revealing information within a single space.
Keep pans smooth and motivated. Don’t just “whip around” because something is happening; decide what the audience should discover during the move and when.
25. Tilt
A tilt moves the camera up or down on a tripod head, like nodding your head. You can use tilts to reveal a character from their feet to their face, or to show towering buildings and structures.
Tilts are especially strong when combined with sound cues or character eye lines. Start on an object, tilt up to the character reacting to it, and you have an instant mini visual story.
26. Push In / Dolly In
A push-in (or dolly-in) moves the camera closer to the subject, increasing emotional intensity. It’s a classic move for realizations, decisions, or moments when you want the audience to lean in.
Keep the move smooth and consistent. A slow, controlled push-in can be more powerful than any flashy effect, especially in dialogue or confession scenes.
27. Pull Out / Dolly Out
A pull-out (or dolly-out) moves the camera away from the subject, often creating emotional distance or revealing more context. It’s great for endings, isolation, or aftermath moments.
Use dolly outs to transition from intimate to detached: a tight close-up pulls back to reveal a character alone in a vast space, and the emotional reading shifts instantly.
28. Zoom
A zoom changes focal length to make the subject appear closer or farther without moving the camera. It feels very different from a dolly because perspective doesn’t change the same way.
Slow zooms can build tension or draw attention without the audience fully noticing. Faster zooms can be stylized, retro, or comedic depending on context.
29. Dolly Zoom / Vertigo Effect
The dolly zoom combines a dolly move with a zoom in the opposite direction, keeping the subject roughly the same size while the background stretches or compresses. It instantly signals psychological shock or disorientation.
It’s tricky to execute physically, but easy to simulate in virtual or AI workflows by animating both the camera position and the field of view. Use it sparingly so it keeps its impact.
30. Roll
A roll rotates the camera around the lens axis, tilting the horizon diagonally or even upside down. It’s disorienting on purpose and works well for chaos, panic, or surreal moments.
Even a small roll can shift the emotional tone of a shot. Save full 90–180 degree rolls for big stylistic moments so they feel earned rather than gimmicky.
31. Tracking Shot
A tracking shot follows a subject as they move through space, keeping the camera at a relatively consistent distance. It puts the audience on the journey with them.
Whether you use a dolly, Steadicam, gimbal, or well‑handled handheld, the goal is the same: stay locked into the character while the world flows around them.
32. Trucking Shot
A trucking shot moves the camera laterally, left or right, often parallel to the subject’s movement. It’s perfect for walk‑and‑talks, street scenes, and following vehicles.
Use foreground elements to enhance parallax and depth. As objects slide across the frame, the shot feels more dynamic and three‑dimensional.
33. Arc Shot
An arc shot circles around your subject on a curved path, revealing them from multiple angles in one move. It’s dynamic and expressive, ideal for emotional or pivotal scenes.
Think of the camera circling two characters as they argue or embrace. The audience feels the emotional orbit, not just static coverage.
34. Boom Shot / Crane
A boom or crane shot moves the camera vertically (often with some horizontal travel) using a jib, crane, or similar rig. It’s fantastic for rising above a scene to reveal scale or descending into a character’s world.
These moves feel inherently cinematic because they’re not part of everyday human experience. Use them for openings, endings, or major transitions.
35. Random / Handheld Movement
Handheld movement introduces micro‑shake and small corrections that feel raw and immediate. It’s great for action, documentary‑style footage, or scenes where you want the viewer to feel inside the chaos.
“Random” shouldn’t mean sloppy. Keep your framing intentional and let the imperfections add energy. In post or AI, subtle handheld emulation can instantly make sterile shots feel more alive.
36–48. AI Camera Movements and Advanced Cinematography Tricks
36. Rack Focus
Rack focus shifts focus from one subject to another within a single shot, guiding the viewer’s attention without moving the camera. It’s perfect for reveals, power shifts, or showing relationships between foreground and background elements.
Ask yourself: “Whose perspective is this right now?” Start in focus on one character, then rack to another at the exact emotional beat you want the audience to switch allegiance.
37. Dolly Forward / Backward (AI)
In AI or virtual workflows, a dolly forward/backward move is a simulated push-in or pull-out generated over a sequence of frames. It behaves like a classic dolly but is entirely software-based.
Use dolly forwards to intensify key frames, closing in on a character, object, or moment. Use a dolly backward to reveal more of the world or to transition out of an emotional beat.
38. Truck Left / Right (AI)
Truck moves in AI mirror lateral camera movement in real life: sliding left or right while keeping your subject framed. The parallax this creates makes even simple environments feel rich and cinematic.
Combine truck motion with character movement, letting them walk one way while the camera offsets in another. It’s an easy way to add visual sophistication without complex rigging.
39. Rotate / Orbit
Rotate/orbit moves spin the camera around a subject or point of interest, similar to an arc shot, but often in a full 360‑degree space. In AI, orbiting is one of the easiest ways to show off a character, vehicle, or environment.
Use orbits for hero moments, product beauty shots, or climactic beats in music videos. Tie the speed and angle to the emotion or the music, not just to show that you can spin the camera.
40. Tilt Up / Down (AI)
In an AI context, tilt up/down mimics a classic tripod tilt but is done by animating the camera’s pitch across frames. It’s perfect for vertical reveals, starting on the ground and tilting up to reveal a towering structure or character.
Because it’s so simple, tilt is a great first move when you’re starting to animate still AI frames. Use it to turn your static key art into a living shot.
41. Pedestal Up / Down
A pedestal move lifts or lowers the entire camera straight up or down without tilting, like an elevator. In real life, jibs or vertical sliders do the job; in AI, it’s just a vertical position change.
Pedestal moves are subtle but great for revealing hidden elements or following characters as they sit, stand, or climb. They add a layer of polish that separates basic motion from deliberate cinematography.
42. Follow Shot
A follow shot keeps the camera locked on a moving subject, matching their speed and direction. This instantly makes your audience feel like they’re traveling with the character.
Follow shots are perfect for walk‑and‑talks, chase scenes, and POV‑style storytelling. In AI edits, you can simulate follow shots by animating the frame to keep your subject centered as the background shifts.
43. Dive Shot
A dive shot moves the camera rapidly downward, as if dropping from the sky toward the subject or environment. Drone dives from high altitude down to street level are a modern version of this move.
Use dive shots for transitions between big wide views and ground‑level action, or to inject adrenaline into intros and trailers. In AI, dive paths make vertical environments (skyscrapers, cliffs) feel truly epic.
44. Push Forward (Fast)
A fast push forward is an accelerated dolly or zoom toward the subject, often used to create surprise, urgency, or impact. Horror and action films love this move for jump scares and reveals.
Sync fast pushes with strong sound design or music hits. That combination of motion + audio is what makes the move feel like a punch rather than just a camera trick.
45. Reveal Shot
A reveal shot hides key information behind an object or character, then unveils it as the camera or subject moves. Dolly to the side, tilt up, or pull focus to reveal someone standing behind a door or an important object in the frame.
Reveals are incredibly powerful storytelling tools. Use them for characters, threats, messages, or even UI elements in your frame. The timing of the reveal is what sells the moment.
46. 180-Degree Rotation
A 180‑degree rotation flips the camera around the subject or axis, changing screen direction entirely. It can simulate a character’s world turning upside down or a radical shift in perspective.
Be mindful of continuity when crossing the 180‑degree line in traditional coverage. When used as a deliberate transition or stylized beat, though, it becomes a bold visual statement.
47. Over-the-Shoulder (OTS)
An over‑the‑shoulder shot frames one character from behind the shoulder of another, typically in dialogue. It instantly clarifies spatial relationships and makes the audience feel included in the conversation.
Adjust how much of the foreground shoulder you show to tweak power dynamics: a larger foreground presence can make the foreground character feel dominant, even if they’re out of focus.
48. Playing with Different Shot Sizes
Understanding different shot sizes, and how to move between them, is one of the core cinematography secrets. Establishings, wides, mediums, close‑ups, and extremes each carry a distinct emotional weight.
Think of shot sizes as your emotional distance slider. Start wide to set context, then move progressively closer as emotion intensifies. When you plan those size changes deliberately, your work stops looking like random coverage and starts feeling like real cinema.
Mastering Cinematography Secrets: Your Next Steps
AI Render Pro: Your Virtual Cinematographer for Pre-Production
AI Render Pro isn’t just another AI toy; it’s a pre‑production weapon for cinematographers and directors. Instead of guessing how a lens choice, angle, or camera move will feel on set, you can prototype dozens of options in minutes and see the mood, framing, and lighting before you shoot a single frame. It turns all the cinematography secrets you’ve learned, shot sizes, depth of field, composition, and movement, into something you can actually visualize and iterate on.
Use it like a virtual DP: block scenes, test different shot lists, and explore variations of the same setup without begging for extra shoot days or renting more gear. You can combine it with tools like Google Flow and Unreal/3D workflows to lock in locations, lighting, and camera paths long before crew call. The result is simple: you show up on set (or in your AI pipeline) with a clear visual plan and way less guesswork.
For solo creators and small teams, it’s basically a cheat code. You get studio‑level pre‑viz power without a studio budget, and you can push your style much further because experimenting is almost free. If you’re serious about making your work look like real cinema, whether it’s live action, virtual production, or fully AI‑generated, AI Render Pro becomes the sandbox where you test, refine, and pressure‑test your ideas until they’re truly production‑ready.
Cinematography Secrets: Frequently Asked Questions
What is the fastest way to make my footage look more cinematic?
Start by controlling your shot sizes, lens choice, and depth of field. Even with a basic camera, choosing stronger compositions, using motivated camera movement, and exposing for mood instead of “perfect” brightness will instantly level up your cinematography.
Do I need expensive cinema lenses to use these cinematography secrets?
No. You can apply every technique in this article with a kit zoom, a cheap 35mm or 50mm prime, or even a phone. What matters most is how you frame, move, and light your shots, not the brand name on the lens.
Can these techniques work for YouTube, reels, or TikTok?
Yes. Short‑form content still benefits from clear shot sizes, intentional angles, and dynamic camera movement. The more cinematic your visual language, the more your videos stand out in the feed, even at 9:16.
How does AI fit into modern cinematography?
AI tools let you previsualize lighting, camera moves, and locations before you commit to a shoot. Instead of guessing on set, you can prototype ideas in AI, then execute only what works in the real world.
These cinematography secrets aren’t just technical knowledge, they’re a visual vocabulary for storytelling. From lens psychology to composition techniques, from depth of field mastery to camera movement and AI camera paths, each element works together to create an emotional impact that goes far beyond simple “good-looking” footage.
The key to mastering these cinematography secrets is deliberate practice. Choose one technique per shoot and focus on it exclusively. Film the same scene with different focal lengths, compositions, and angles. Study how professional cinematographers use these techniques in your favorite films, and how you can adapt them in AI or virtual workflows.
Remember: the best camera is the one you have, but the best cinematography comes from understanding these fundamental cinematography secrets and applying them with intention. Start small, iterate often, and let your images do the talking.
Discover more from Olivier Hero Dressen Blog: Filmmaking & Creative Tech
Subscribe to get the latest posts sent to your email.
Work with Olivier
Director | CD | DP & Photographer
Specializing in commercials, music videos, AI-driven filmmaking, and cinematic storytelling for brands and production companies.
🌍 Shanghai · Paris · Los Angeles · Dubai
🎬 View Portfolio & Get in Touch


[…] insights into how dedicated lenses can transform visual narratives, consider articles discussing Cinematography Secrets: 48 Techniques That Transform Amateur Footage. This 7Artisans 135mm lens is not just a product; it’s a statement about accessibility and […]
[…] highlight — Its advanced color science and grading tools provide precise control, essential for professional cinematography and maintaining artistic […]
[…] the behavioral authenticity that single-camera precision often kills. You feel it throughout. The cinematography doesn’t illustrate the story — it encloses […]
[…] Let’s dive into the seven prompts that will transform your AI art from amateur to professional. […]